


Tutorial de Interruptor Dimmer usando YYAC-3S para ESP32
Nesta seção vamos criar um Interruptor Dimmer usando ESP32 e depois controlar o brilho da luz via Amazon Alexa, GoogleHome ou SmartThings.
Pré-requisitos:
- ESP32.
- YYAC-3S.
- Lâmpada Dimmer.
- Cabos Jumper.
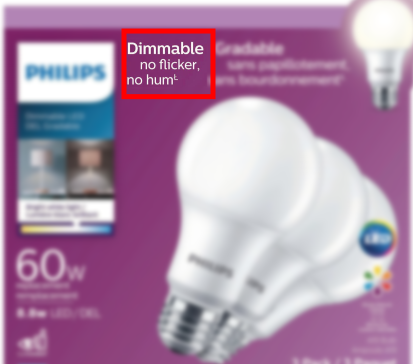
Nem todas as lâmpadas são dimerizáveis. Verifique a etiqueta do fabricante para ver se a lâmpada é dimerizable.
Introdução rápida ao YYAC-3S
O módulo YYAC-3S pode ser usado para controlar o fornecimento de eletricidade AC usando PWM de um Arduino, ESP8266, ESP32 ou Pico W. Pode ser usado para controlar a velocidade de motores AC e o brilho de lâmpadas dimerizáveis. O circuito consiste em um SCR e um optoacoplador no lado de entrada. Isso evita que a corrente flua de volta para o MCU e também o separa do terra, tornando-o seguro para usar. O módulo suporta uma entrada PWM de 0-255 e pode controlar tensão AC até 220V com uma corrente máxima de 3A.
Fiação
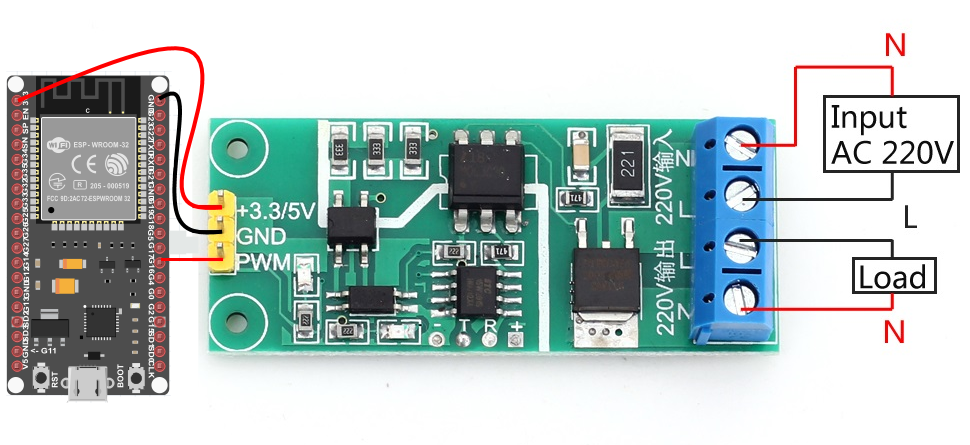
Conecte o módulo YYAC-3S ao microcontrolador da seguinte forma:
- Pino VCC ao pino 5V do microcontrolador (3.3V não parece funcionar).
- Pino GND ao pino GND do ESP32.
- Pino PWM a um pino digital 16 no microcontrolador.
| MCU | Pino PWM YYAC-3S |
|---|---|
| ESP32 | 16 |
Vamos verificar se o módulo YYAC-3S está conectado corretamente e funcionando.
const int pwmPin = 16;  // 16 corresponds to GPIO16 of ESP32

// setting PWM properties
const int freq = 1000; // 1KHz
const int ledChannel = 0;
const int resolution = 8;

void setup(){
  ledcSetup(ledChannel, freq, resolution);
  ledcAttachPin(pwmPin, ledChannel);
}

void loop(){

   /* dutyCycle between 0 to 115 does not seems to have an any effect on the bulb. */

  // increase the brightness.
  for(int dutyCycle = 115; dutyCycle <= 255; dutyCycle++){
    ledcWrite(ledChannel, dutyCycle);
    delay(15);
  }

  // decrease the brightness
  for(int dutyCycle = 255; dutyCycle >= 115; dutyCycle--){
    ledcWrite(ledChannel, dutyCycle);
    delay(15);
  }
}
O Monitor Serial do Arduino IDE mostrará a lâmpada dimmer assim:
Passo 1: Criar um novo dispositivo no Sinric Pro
- Faça login na sua conta Sinric Pro, vá ao menu Dispositivos à esquerda e clique no botão Adicionar Dispositivo (no canto superior esquerdo).
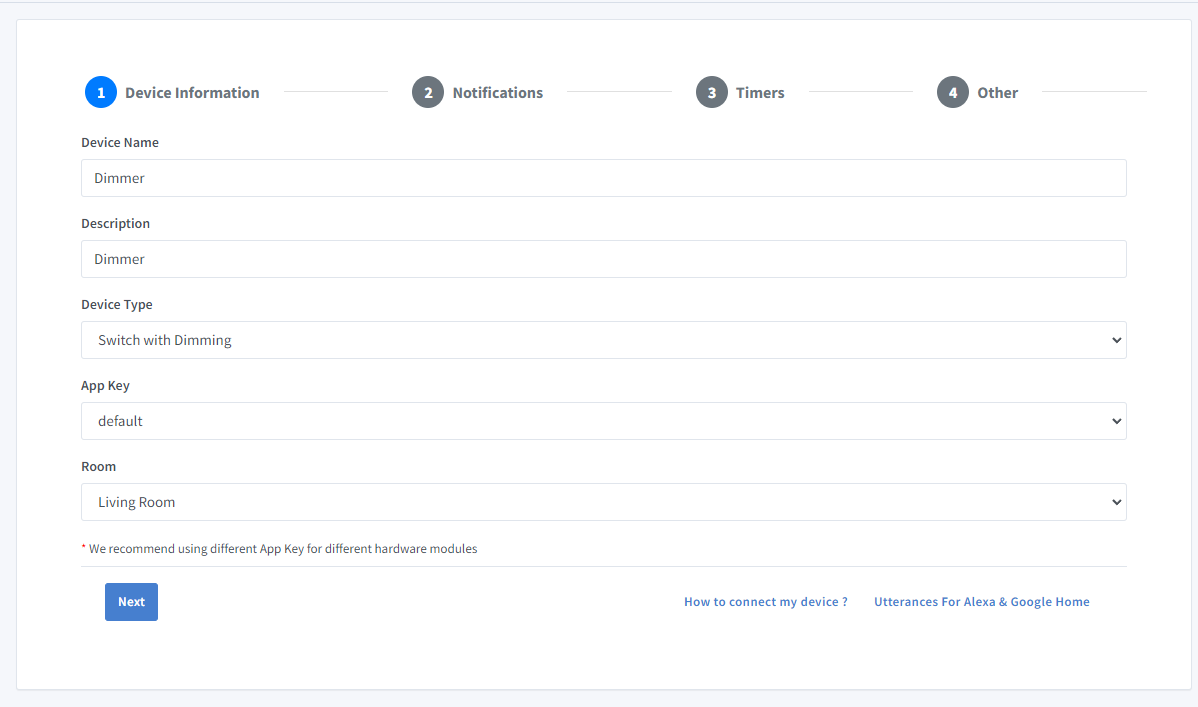
- Digite o nome do dispositivo Dimmer, descrição Dimmer e selecione o tipo de dispositivo como Switch With Dimming.
-
Clique na aba Outros e Clique em Salvar
-
A próxima tela mostrará as credenciais necessárias para conectar o dispositivo que você acabou de criar.
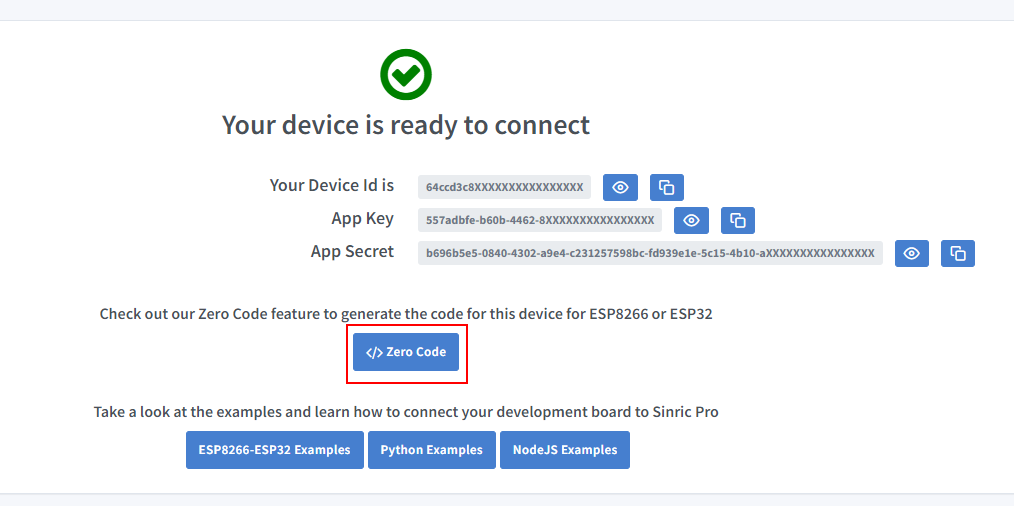
- Copie o ID do Dispositivo, Chave do App e Segredo do App Mantenha esses valores seguros. NÃO OS COMPARTILHE EM FÓRUNS PÚBLICOS!
Passo 2: Conectar ao Sinric Pro
Passo 2.1 Instalar a Biblioteca Sinric Pro

2.2 Código Completo
//Uncomment the following line to enable serial debug output
//#define ENABLE_DEBUG

#ifdef ENABLE_DEBUG
  #define DEBUG_ESP_PORT Serial
  #define NODEBUG_WEBSOCKETS
  #define NDEBUG
#endif

#include <Arduino.h>
#if defined(ESP8266)
  #include <ESP8266WiFi.h>
#elif defined(ESP32) || defined(ARDUINO_ARCH_RP2040)
  #include <WiFi.h>
#endif

#include "SinricPro.h"
#include "SinricProDimSwitch.h"

#define WIFI_SSID         ""
#define WIFI_PASS         ""
#define APP_KEY           ""   // Should look like "de0bxxxx-1x3x-4x3x-ax2x-5dabxxxxxxxx"
#define APP_SECRET        ""   // Should look like "5f36xxxx-x3x7-4x3x-xexe-e86724a9xxxx-4c4axxxx-3x3x-x5xe-x9x3-333d65xxxxxx"
#define DIMSWITCH_ID      ""   // Should look like "5dc1564130xxxxxxxxxxxxxx"
#define BAUD_RATE         9600                // Change baudrate to your need

// we use a struct to store all states and values for our dimmable switch
struct {
  bool powerState = false;
  int powerLevel = 0;
} device_state;

// the PWM Pin
const int pwmPin = 16;  // 16 corresponds to GPIO16

// setting PWM properties
const int freq = 1000; // 1KHz
const int ledChannel = 0;
const int resolution = 8;

void setPWM(int powerLevel) {
   int dutyCycle = map(powerLevel, 0, 100, 115, 255); // Map power level from 0 to 100, to a value between 115 to 255
   ledcWrite(ledChannel, dutyCycle);
   delay(30);
}

bool onPowerState(const String &deviceId, bool &state) {
  Serial.printf("Device %s power turned %s \r\n", deviceId.c_str(), state?"on":"off");
  device_state.powerState = state;
  setPWM(state ? 100: 0);
  return true; // request handled properly
}

bool onPowerLevel(const String &deviceId, int &powerLevel) {
  device_state.powerLevel = powerLevel;
  setPWM(powerLevel);
  Serial.printf("Device %s power level changed to %d\r\n", deviceId.c_str(), device_state.powerLevel);
  return true;
}

bool onAdjustPowerLevel(const String &deviceId, int &levelDelta) {
  device_state.powerLevel += levelDelta;
  Serial.printf("Device %s power level changed about %i to %d\r\n", deviceId.c_str(), levelDelta, device_state.powerLevel);
  levelDelta = device_state.powerLevel;
  setPWM(levelDelta);
  return true;
}

void setupWiFi() {
  Serial.printf("\r\n[Wifi]: Connecting");

  #if defined(ESP8266)
    WiFi.setSleepMode(WIFI_NONE_SLEEP);
    WiFi.setAutoReconnect(true);
  #elif defined(ESP32)
    WiFi.setSleep(false);
    WiFi.setAutoReconnect(true);
  #endif

  WiFi.begin(WIFI_SSID, WIFI_PASS);

  while (WiFi.status() != WL_CONNECTED) {
    Serial.printf(".");
    delay(250);
  }
  IPAddress localIP = WiFi.localIP();
  Serial.printf("connected!\r\n[WiFi]: IP-Address is %d.%d.%d.%d\r\n", localIP[0], localIP[1], localIP[2], localIP[3]);
}

void setupSinricPro() {
  SinricProDimSwitch &myDimSwitch = SinricPro[DIMSWITCH_ID];

  // set callback function to device
  myDimSwitch.onPowerState(onPowerState);
  myDimSwitch.onPowerLevel(onPowerLevel);
  myDimSwitch.onAdjustPowerLevel(onAdjustPowerLevel);

  // setup SinricPro
  SinricPro.onConnected([](){ Serial.printf("Connected to SinricPro\r\n"); });
  SinricPro.onDisconnected([](){ Serial.printf("Disconnected from SinricPro\r\n"); });
  SinricPro.begin(APP_KEY, APP_SECRET);
}

void setupYYAC3S(){
  ledcSetup(ledChannel, freq, resolution);
  ledcAttachPin(pwmPin, ledChannel);
}

// main setup function
void setup() {
  Serial.begin(BAUD_RATE); Serial.printf("\r\n\r\n");
  setupYYAC3S();
  setupWiFi();
  setupSinricPro();
}

void loop() {
  SinricPro.handle();
}
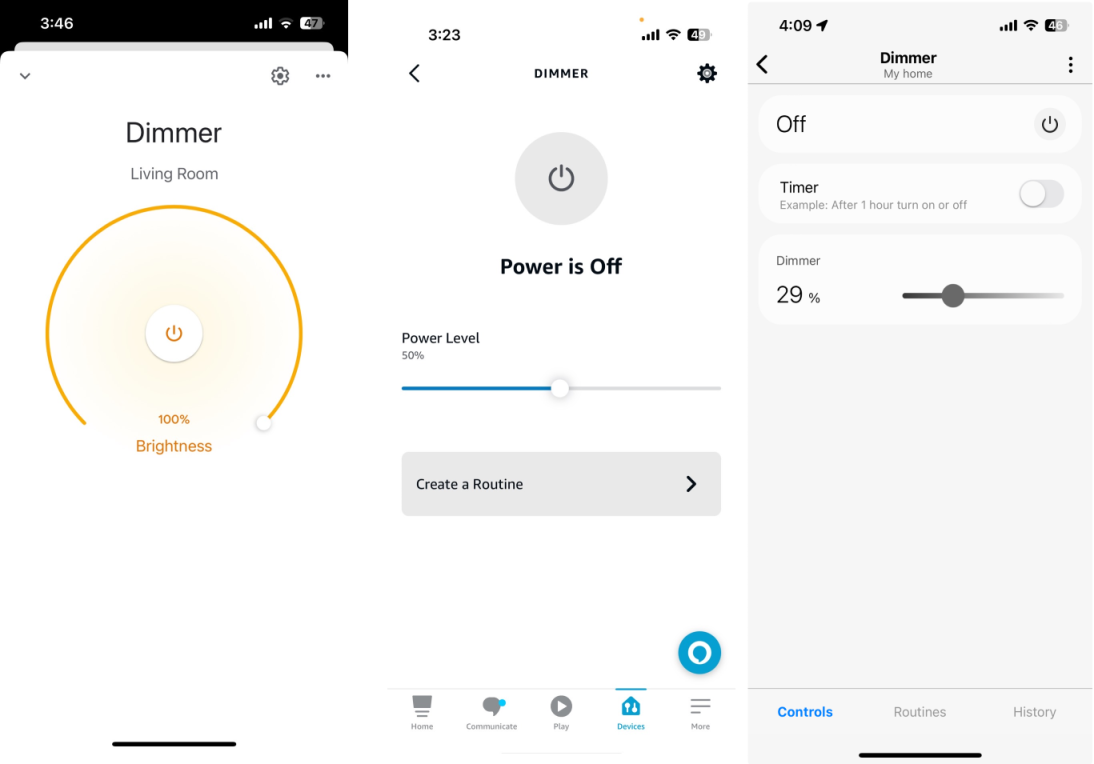
Agora você deve conseguir controlar o nível de brilho via aplicativos Alexa, Google Home e SmartThings
Solução de Problemas
- Não dimeriza? Verifique a etiqueta do fabricante para ver se a lâmpada é dimerizable.
- PWM não funciona?
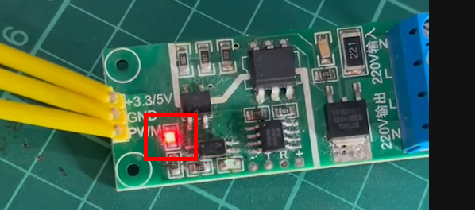
O LED acima acende quando o módulo recebe o sinal PWM do MCU.
- Consulte nossa página de Solução de Problemas para mais detalhes.
Este documento é código aberto. Viu um erro de digitação? Por favor, crie uma issue