


Relais mit MicroPython auf einem Raspberry Pi Pico W mit Thonny steuern (Ein/Aus)
In dieser Anleitung zeigen wir dir, wie du MicroPython auf deinem Raspberry Pi Pico W einrichtest, einen Sinric Pro Smart Switch anlegst und ihn über gängige Smart-Home-Plattformen wie Alexa, Google Home und SmartThings steuerst.
Voraussetzungen :
- Raspberry Pi Pico W Entwicklungsboard x 1.
- SPDT-Relaismodul x 1.
- Jumperkabel.
MicroPython auf deinem Raspberry Pi Pico W installieren
-
Lade die neueste MicroPython Firmware für den Raspberry Pi Pico W herunter: https://rpf.io/pico-w-firmware
-
Verbinde ein Ende eines Micro-USB-Kabels mit deinem Raspberry Pi Pico W.
-
Halte den BOOTSEL-Taster auf dem Pico W gedrückt.
-
Stecke das andere Ende des USB-Kabels in deinen Computer (Desktop, Laptop oder Raspberry Pi).
-
Der Pico W erscheint als Wechseldatenträger (normalerweise mit dem Namen
RPI-RP2) in deinem Dateimanager.
Ziehe die heruntergeladene MicroPython.uf2-Datei per Drag & Drop auf dieses Laufwerk.
Der Pico W startet automatisch neu und die Verbindung wird getrennt – das ist normal. Danach ist MicroPython installiert und einsatzbereit.
Die Installation testen:
-
Öffne den Thonny Editor.
-
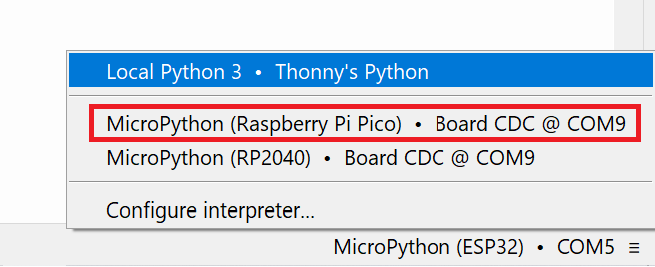
Klicke unten rechts auf den Text und wähle aus den Optionen MicroPython (Raspberry Pi Pico) aus.
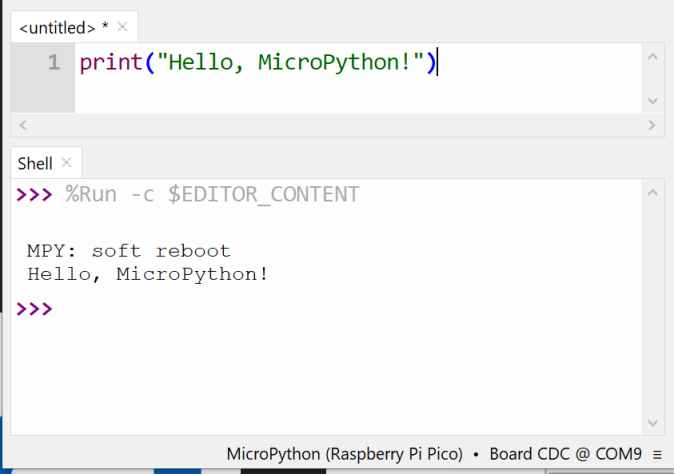
Gib in der Shell Folgendes ein
print("Hello, MicroPython!")
SinricPro Bibliothek einrichten
-
Lade das neueste Wheel-Paket
.whlvon https://github.com/sinricpro/micropython-sinricpro-sdk/releases herunter -
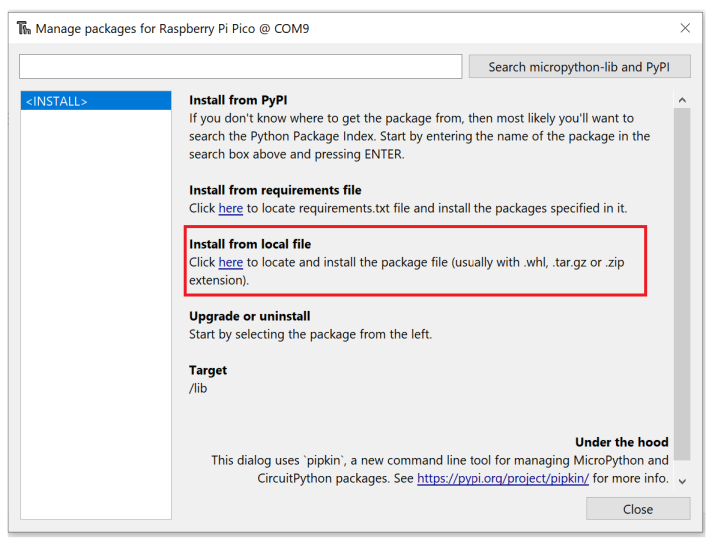
Wähle in Thonny Tools > Manage packages.
-
Klicke im Bereich
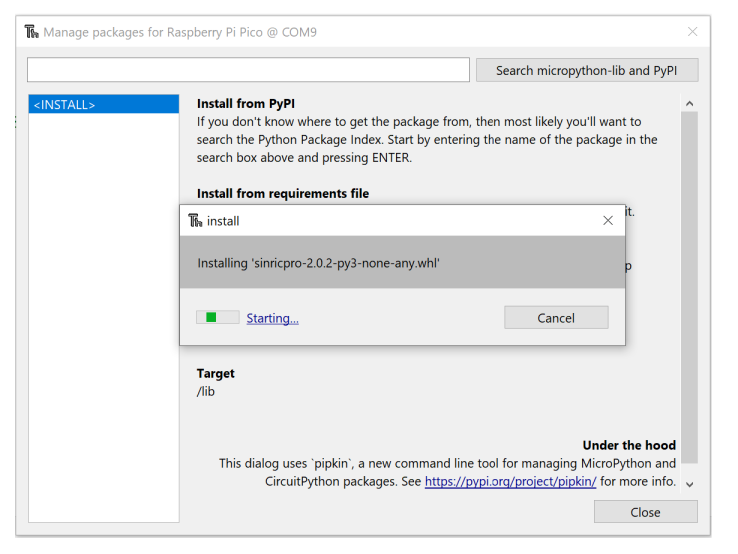
Install from Local FileaufHereund folge der Installation.
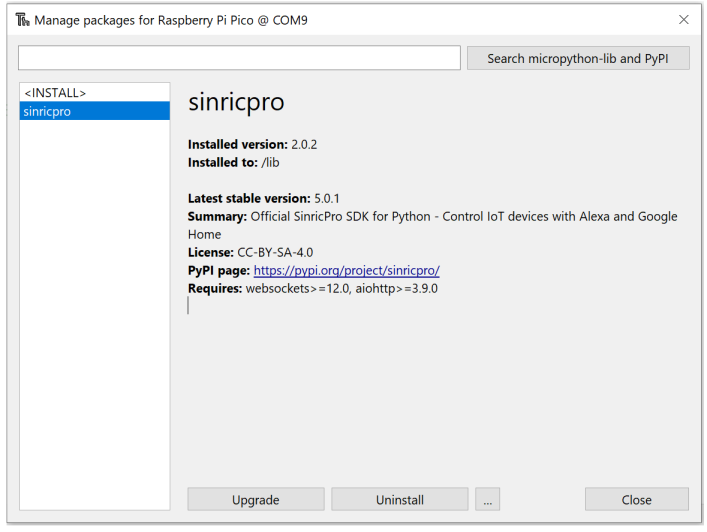
Sinric Pro Integration
Schritt 1 : Neues Gerät in Sinric Pro anlegen
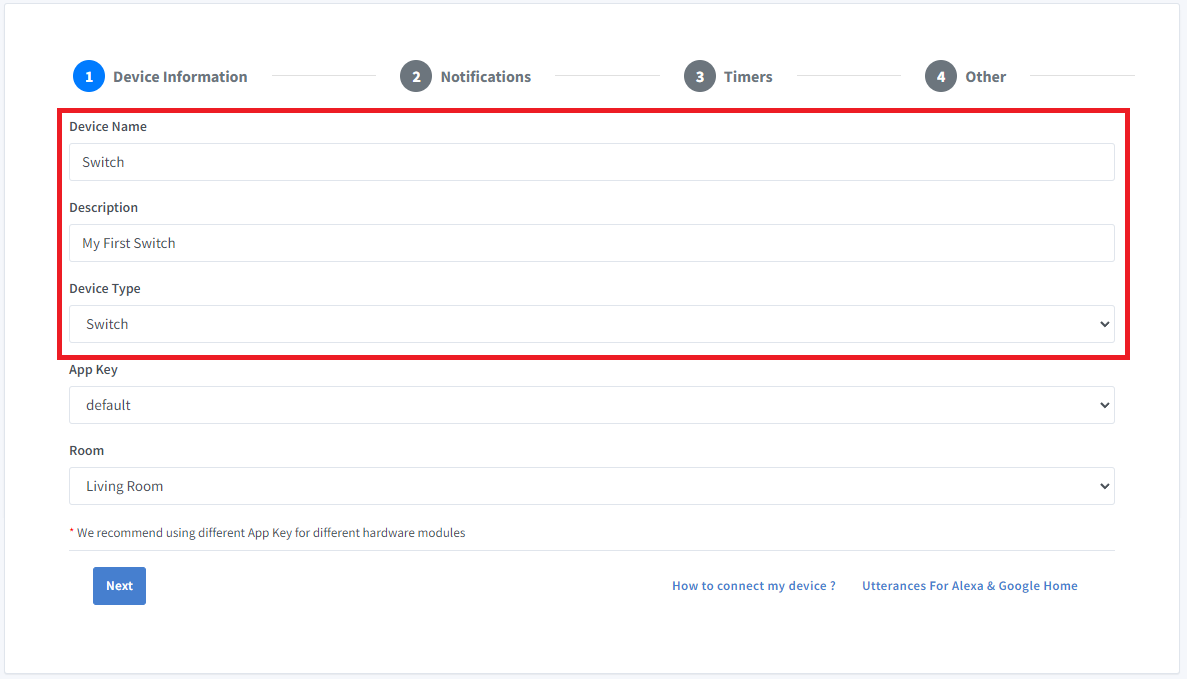
- Melde dich bei deinem Sinric Pro Konto an, öffne links das Menü Devices und klicke auf die Schaltfläche Add Device (oben links).
- Gib als Gerätenamen Switch und als Beschreibung My First Switch ein und wähle den Gerätetyp Switch.
- Klicke im Tab Notifications auf Next
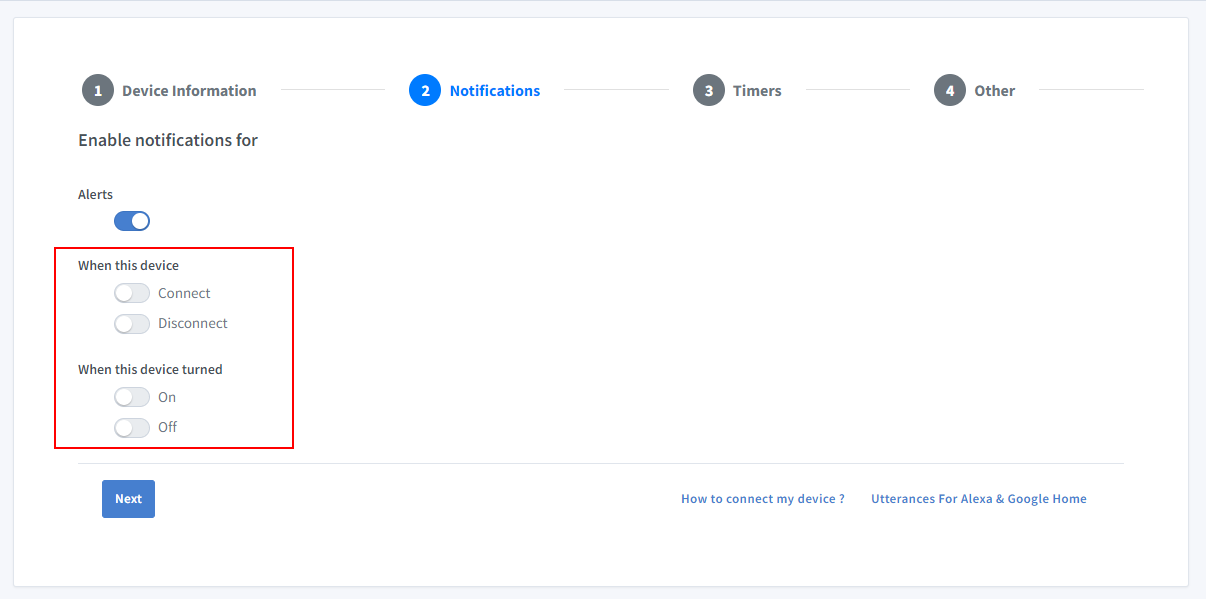
Um Push-Benachrichtigungen zu erhalten, wenn dein Gerät online oder offline geht, aktiviere die Option „Connect and Disconnect“ in der Sinric Pro App. Um Push-Benachrichtigungen zu erhalten, wenn dein Gerät ein- oder ausgeschaltet wird, aktiviere die Option „On and Off“.
-
Klicke auf Others und dann auf Save
-
Die nächste Seite zeigt die Zugangsdaten, die das eben angelegte Gerät für die Verbindung braucht.
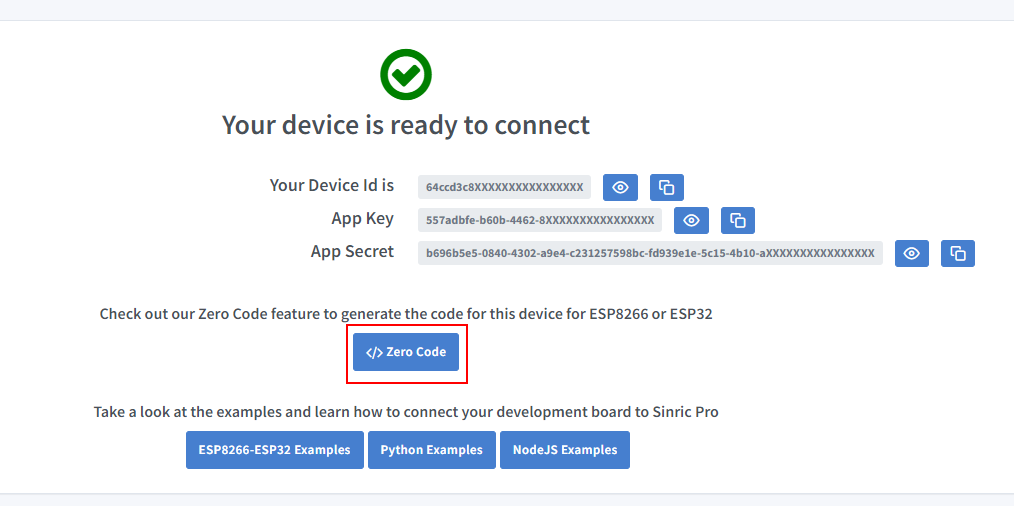
- Kopiere Device Id, App Key und App Secret. Halte diese Werte geheim. TEILE SIE NICHT IN ÖFFENTLICHEN FOREN!
Schritt 2 : Programmierung
Füge den folgenden Code in main.py ein
from sinricpro import SinricPro
from sinricpro.devices.sinricpro_switch import SinricProSwitch
from machine import Pin

import uasyncio as a
import network

# enter wifi details
ssid = ""
ssid_password = ""

# enter appkey, appsecret and device id from above
app_key    = ""
app_secret = ""
device_id  = ""

# relay is connected to GPIO 16
relay = Pin(16, Pin.OUT)

async def on_disconnected():
    print('Disconnected from SinricPro...reboot?')

async def on_connected():
    print('Connected to SinricPro...')

async def on_power_state_callback(device_id: str, state: bool):
    print(f'device id: {device_id} state: {state}')

    if state:
        relay.value(1)
    else:
        relay.value(0)

    return True

# connect to wifi
def do_connect():
    sta_if = network.WLAN(network.STA_IF)
    ap = network.WLAN(network.AP_IF) # create access-point interface
    ap.active(False)         # deactivate the interface
    if not sta_if.isconnected():
        print('Connecting to network...')
        sta_if.active(True)
        sta_if.connect(ssid, ssid_password)
        while not sta_if.isconnected():
            pass
    print('Connected network config:', sta_if.ifconfig())

# start sinricpro
def do_sinricpro():
    sinricpro = SinricPro()
    sinricpro.on_connected(on_connected)
    sinricpro.on_disconnected(on_disconnected)

    sinricpro_switch = SinricProSwitch(device_id)
    sinricpro_switch.on_power_state(on_power_state_callback)

    sinricpro.add_device(sinricpro_switch)
    sinricpro.start(app_key, app_secret)

# main coroutine
async def main():
    do_connect()
    do_sinricpro()

    while True:
        await a.sleep_ms(10_000)

# start asyncio task and loop
try:
    # start the main async tasks
    a.run(main())
finally:
    # reset and start a new event loop for the task scheduler
    a.new_event_loop()
Das war’s.
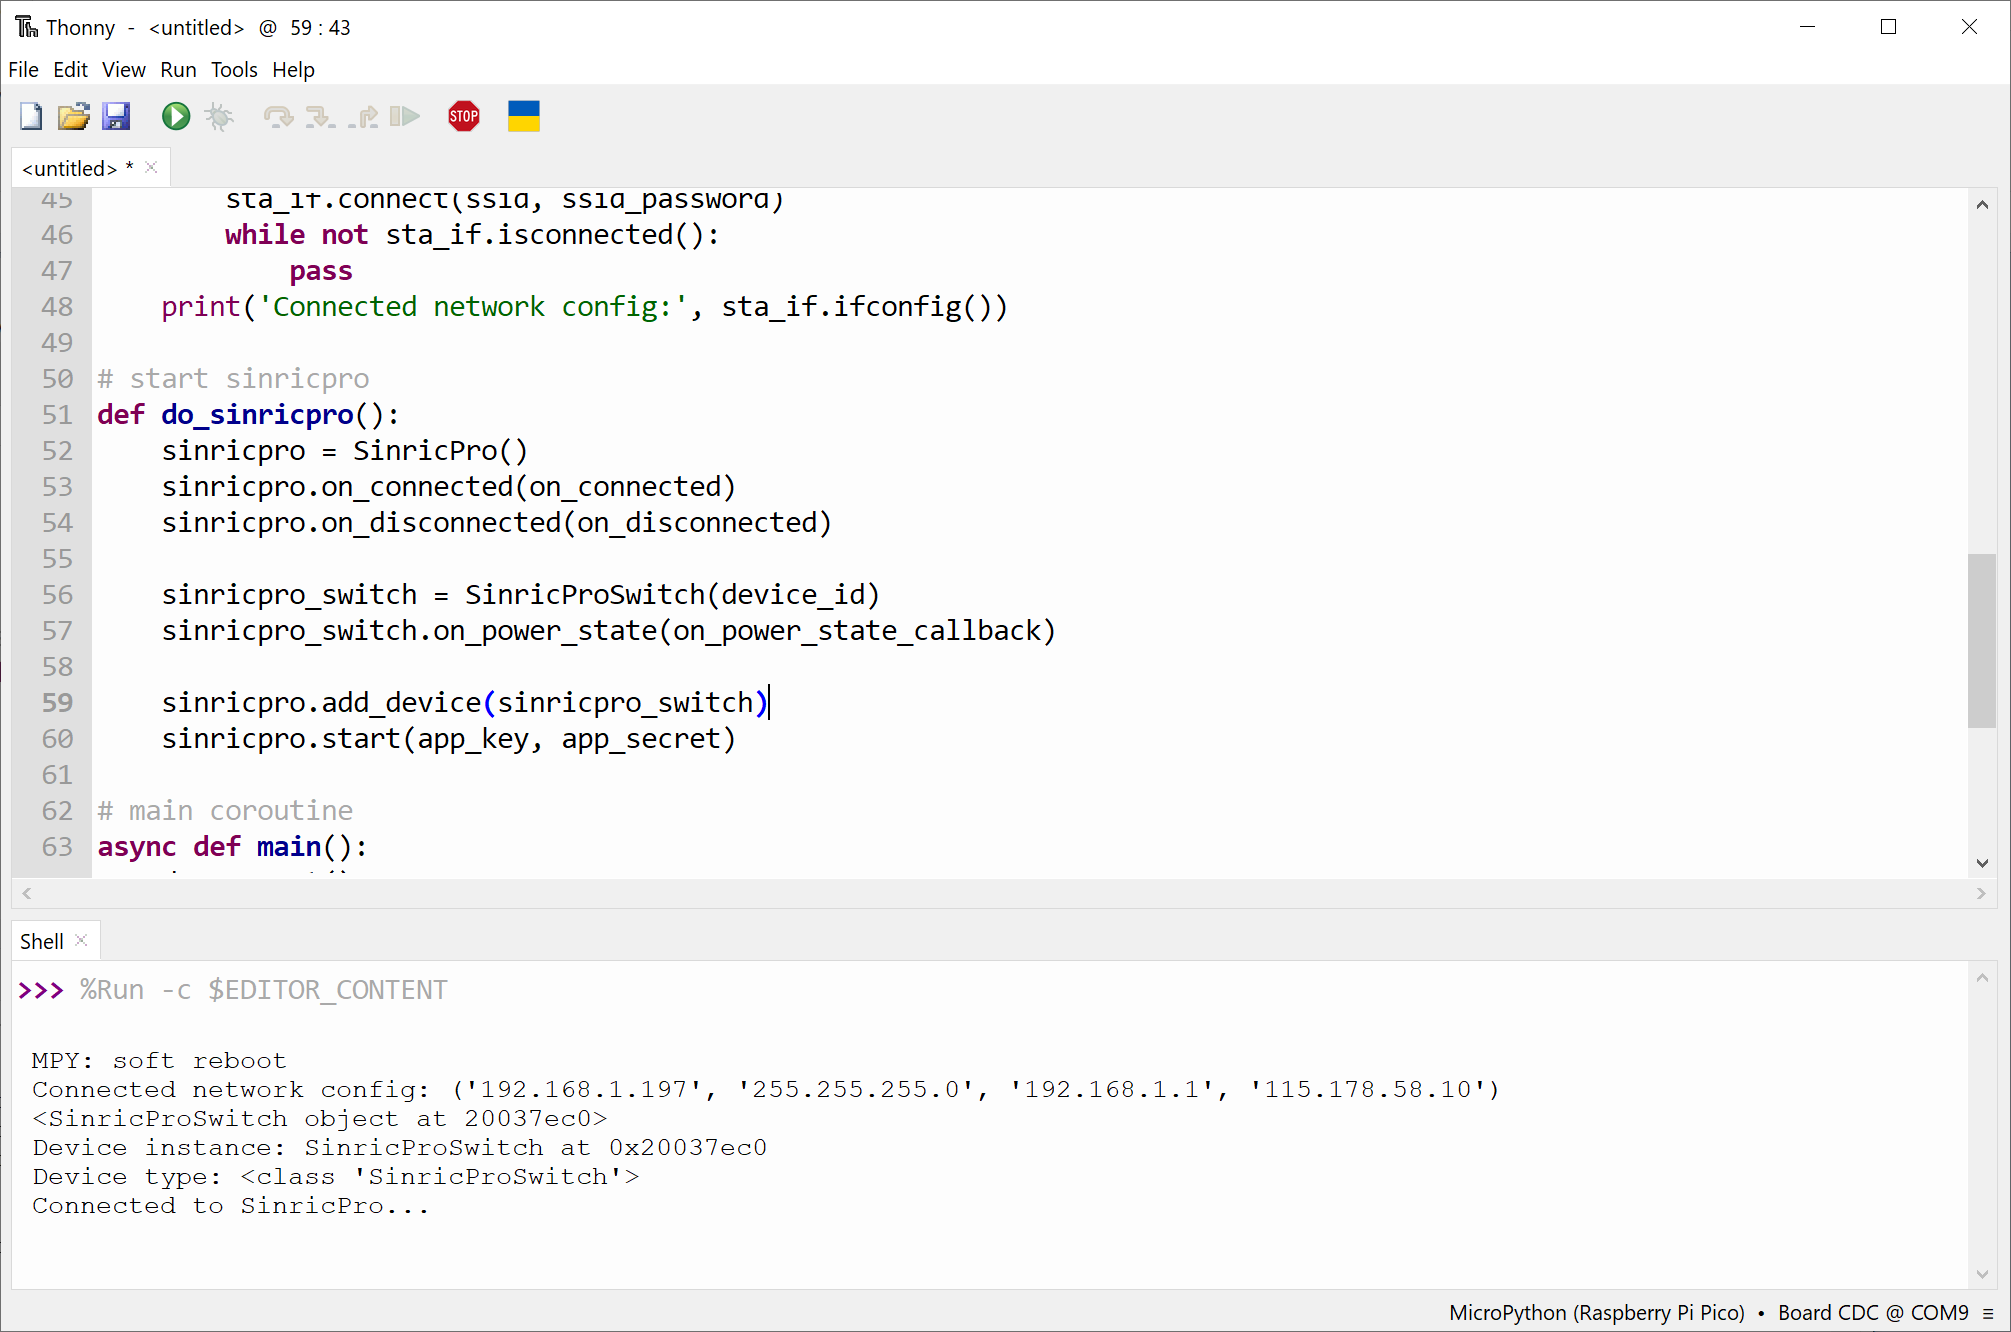
Das Gerät ist jetzt mit dem Sinric Pro Server verbunden, und du kannst es über die Sinric Pro App, den Alexa Skill, die Google Home Action oder SmartThings steuern
Verwandte Tutorials
- ESP32 oder ESP8266 mit Alexa und Google Home steuern
- Relais mit MicroPython auf dem ESP32
- Switch-Tutorial Teil 1: ein Relais ein- und ausschalten
Dieses Dokument ist Open Source. Einen Tippfehler entdeckt? Bitte erstelle ein Issue