


Campainha Inteligente usando ESP32, ESP8266 ou Raspberry Pi Pico W para Alexa, Google Home
Nesta seção vamos criar uma Campainha usando um botão push (tátil) conectado a um ESP32, ESP8266 ou Raspberry Pi Pico W e depois receber uma notificação na Alexa, Google Home, ou no aplicativo Sinric Pro.
Pré-requisitos:
- ESP32, ESP8266 ou Raspberry Pi Pico W x 1.
- Botão push x 1.
- Resistor de 1K ~ 10K x 1
- Cabos Jumper.
Fiação do botão da Campainha
Vamos usar a abordagem Pull-Down para conectar nosso botão. Quando o botão é pressionado, digitalRead lê sinal HIGH (1).
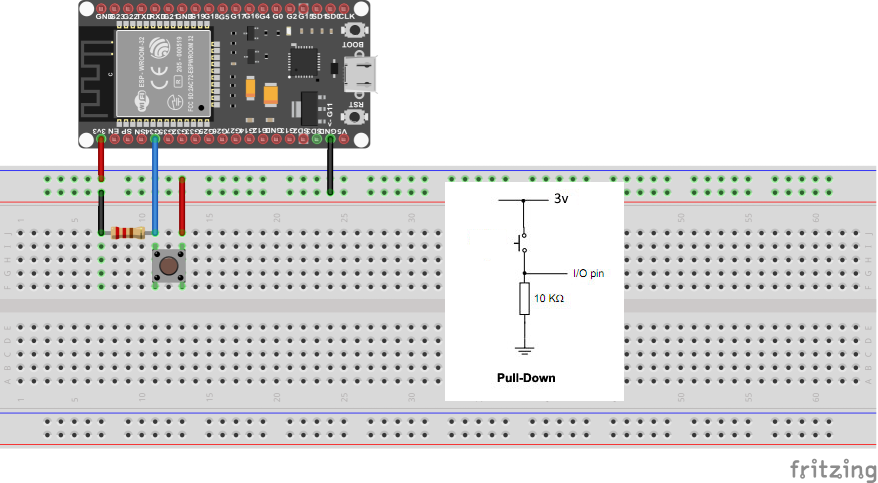
| MCU | Pino GPIO |
|---|---|
| ESP32 | 34 |
| ESP8266 | 4 (D2) |
| Pico W | 7 |
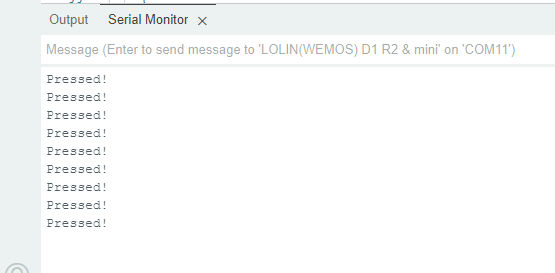
Lendo o estado do botão
Vamos verificar se o sensor está conectado corretamente e funcionando.
#if defined(ESP8266)
  #define BUTTON_PIN        D4
#elif defined(ESP32)
  #define BUTTON_PIN        34
#elif (ARDUINO_ARCH_RP2040)
  #define BUTTON_PIN        7
#endif

int button_state;
int lastbutton_state = LOW;

unsigned long last_debounce_time = 0;
unsigned long debounce_delay = 50; // increase if needed.

void setup() {
  Serial.begin(115200);
  pinMode(BUTTON_PIN, INPUT);
}

void handle_button_press() {
  int reading = digitalRead(BUTTON_PIN);
  if (reading != lastbutton_state) {
    last_debounce_time = millis();
  }

  if ((millis() - last_debounce_time) > debounce_delay) {
    if (reading != button_state) {
      button_state = reading;

      if (button_state == HIGH) {
        Serial.printf("Pressed!\r\n");
      }
    }
  }

  lastbutton_state = reading;
}

void loop() {
  handle_button_press();
}
Passo 1: Conectar ao Sinric Pro
Criar um novo dispositivo: campainha
-
Faça login na sua conta Sinric Pro e vá ao menu Dispositivos à esquerda.
-
Clique no botão Adicionar Dispositivo (no canto superior esquerdo).
-
Digite o nome do dispositivo campainha, descrição campainha inteligente e selecione o tipo como Doorbell.
-
Clique em Salvar para criar o dispositivo
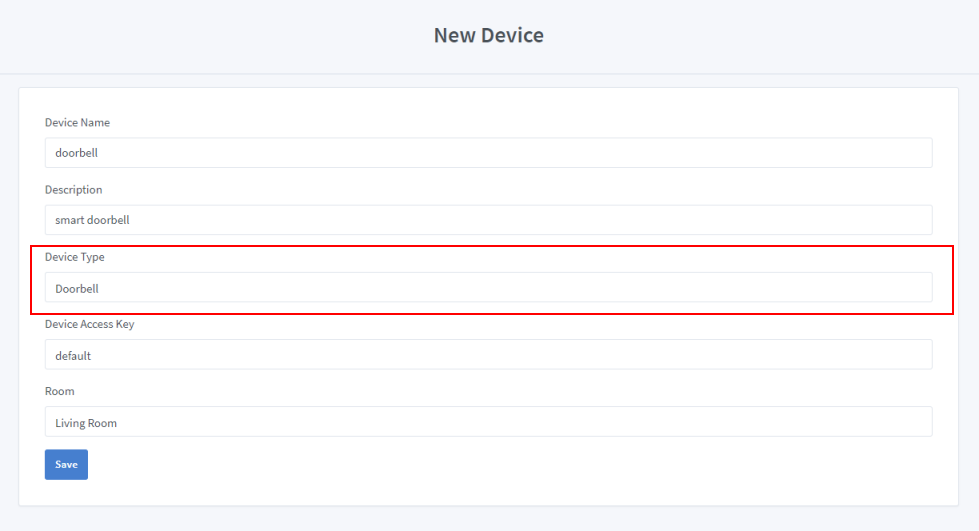
Uma vez que você clique no botão salvar, a Amazon Alexa detectará automaticamente o dispositivo que acabamos de criar (Se você vinculou nossa skill Alexa antes).
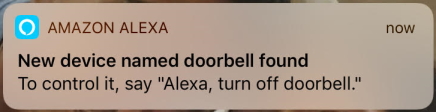
Se você não recebeu a notificação push, apenas peça à Alexa para descobrir dispositivos
Passo 1.1 Instalar a Biblioteca Sinric Pro

2.2 Código Completo
// Uncomment the following line to enable serial debug output
//#define ENABLE_DEBUG

#ifdef ENABLE_DEBUG
  #define DEBUG_ESP_PORT Serial
  #define NODEBUG_WEBSOCKETS
  #define NDEBUG
#endif

#include <Arduino.h>
#if defined(ESP8266)
  #include <ESP8266WiFi.h>
#elif defined(ESP32) || defined(ARDUINO_ARCH_RP2040)
  #include <WiFi.h>
#endif

#include "SinricPro.h"
#include "SinricProDoorbell.h"

// Grab it from https://portal.sinric.pro.
#define APP_KEY    "" //Should look like "de0bxxxx-1x3x-4x3x-ax2x-5dabxxxxxxxx"
#define APP_SECRET "" //Should look like "5f36xxxx-x3x7-4x3x-xexe-e86724a9xxxx-4c4axxxx-3x3x-x5xe-x9x3-333d65xxxxxx"
#define DOORBELL_ID  "" //Should look like "6534xxxxxxxc08c6ea1b"

#define SSID       "" // Your WiFi SSID
#define PASS       "" // Your WiFi Password

#define BAUD_RATE         115200                // Change baudrate to your need

#if defined(ESP8266)
  #define BUTTON_PIN        D4
#elif defined(ESP32)
  #define BUTTON_PIN        34
#elif (ARDUINO_ARCH_RP2040)
  #define BUTTON_PIN        7
#endif

int button_state;
int lastbutton_state = LOW;

unsigned long last_debounce_time = 0;
unsigned long debounce_delay = 50; // increase if needed.
SinricProDoorbell& myDoorbell = SinricPro[DOORBELL_ID];

void handleButtonPress() {
  int reading = digitalRead(BUTTON_PIN);
  if (reading != lastbutton_state) {
    last_debounce_time = millis();
  }

  if ((millis() - last_debounce_time) > debounce_delay) {
    if (reading != button_state) {
      button_state = reading;

      if (button_state == HIGH) {
        Serial.printf("[handleButtonPress()]: Button pressed!\r\n");
        bool success = myDoorbell.sendDoorbellEvent();
        if(!success) {
          Serial.printf("[handleButtonPress()]: Something went wrong...could not send Event to server!\r\n");
        }
      }
    }
  }

  lastbutton_state = reading;
}

void setupWiFi() {
  Serial.printf("\r\n[setupWiFi()]: Connecting");

  #if defined(ESP8266)
    WiFi.setSleepMode(WIFI_NONE_SLEEP);
    WiFi.setAutoReconnect(true);
  #elif defined(ESP32)
    WiFi.setSleep(false);
    WiFi.setAutoReconnect(true);
  #endif

  WiFi.begin(WIFI_SSID, WIFI_PASS);

  while (WiFi.status() != WL_CONNECTED) {
    Serial.printf(".");
    delay(250);
  }
  IPAddress localIP = WiFi.localIP();
  Serial.printf("connected!\r\n[setupWiFi()]: IP-Address is %d.%d.%d.%d\r\n", localIP[0], localIP[1], localIP[2], localIP[3]);
}

void setupSinricPro() {
  SinricPro.onConnected([](){ Serial.printf("Connected to SinricPro\r\n"); });
  SinricPro.onDisconnected([](){ Serial.printf("Disconnected from SinricPro\r\n"); });
  SinricPro.begin(APP_KEY, APP_SECRET);
}

void setupButton() {
  pinMode(BUTTON_PIN, INPUT);
}

void setup() {
  Serial.begin(BAUD_RATE); Serial.printf("\r\n\r\n");
  setupButton();
  setupWiFi();
  setupSinricPro();
}

void loop() {
  handleButtonPress();
  SinricPro.handle();
}
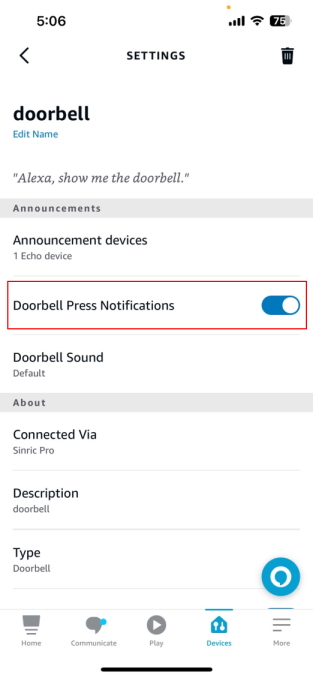
Nota: As notificações de campainha da Alexa estão desabilitadas por padrão. Você deve habilitá-las abrindo o aplicativo para receber a notificação DingDong na Alexa.
Solução de Problemas
-
Botão push muito sensível? Você pode ajustar
debounce_delayou tentar a solução proposta em issues/346 -
Consulte nossa página de Solução de Problemas para possíveis soluções para seu problema.
Este documento é código aberto. Viu um erro de digitação? Por favor, crie uma issue