


Einen 5050 RGB LED-Streifen mit ESP32 oder ESP8266 über Alexa und Google Home steuern
In diesem Abschnitt zeigen wir dir, wie du einen LED-Lichtstreifen mit ESP32, ESP8266 baust und ihn dann über Amazon Alexa, Google Home oder SmartThings steuerst.
Voraussetzungen :
- ESP32, ESP8266 x 1.
- IRF540N MOSFET, STP16nF06L MOSFET, S8050 NPN-Transistor oder BC337 NPN-Transistor x 3
- 1k-Widerstand x 3
- Jumperkabel.
In diesem Tutorial verwenden wir BC337 NPN-Transistoren.
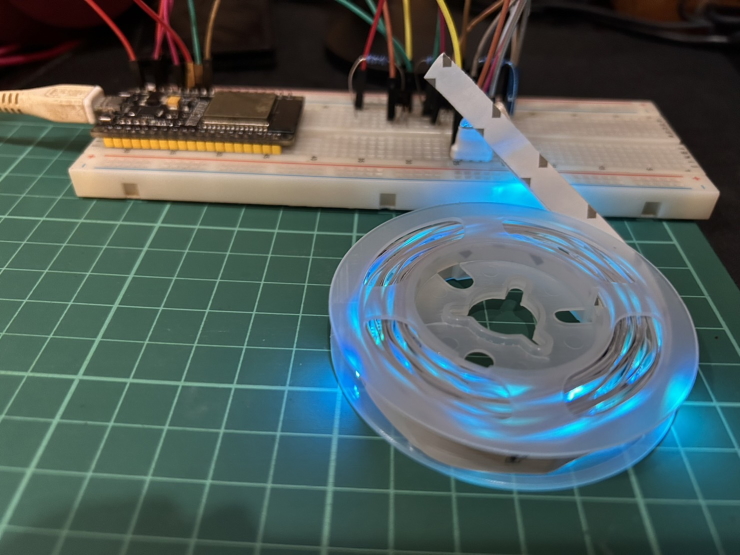
Kurze Einführung zu 5050 LED-Streifen
5050 LED-Streifen sind eine Art von LED-Streifen, die aus einzelnen LEDs bestehen, die in Dreiergruppen angeordnet sind. Jede Dreiergruppe wird als Pixel bezeichnet. Die Pixel sind auf einem langen, dünnen Streifen angeordnet und können auf die benötigte Länge zugeschnitten werden. 5050 LED-Streifen sind in verschiedenen Farben erhältlich, darunter Rot, Grün, Blau, Weiß und Gelb. Sie sind außerdem in verschiedenen Helligkeitsstufen erhältlich. 5050 LED-Streifen sind preisgünstige LED-Streifen, die den teureren Neopixel-Streifen ähnlich aussehen. Die LEDs in 5050 LED-Streifen können jedoch nicht einzeln angesteuert werden. Das bedeutet, dass du immer nur eine Farbe für den gesamten Streifen gleichzeitig verwenden kannst.
Hier ist eine Tabelle, die die wichtigsten Unterschiede zwischen 5050 LED-Streifen und Neopixel-Streifen zusammenfasst:
| Eigenschaft | 5050 LED-Streifen | Neopixel-Streifen |
|---|---|---|
| Preis | Günstig | Teurer |
| Einzeln adressierbare LEDs | Nein | Ja |
| Animationen | Beschränkt auf gängige Animationen wie Farbwechsel und Dimmen | Komplexe Animationen mit einzelnen LEDs möglich |
Pinout des 5050 RGB LED-Streifens
Ein Standard-(nicht adressierbarer) 5050 RGB-Streifen hat 4 Pads: ein gemeinsames Plus-Pad und je ein Pad pro Farbe.
| Pad | Funktion |
|---|---|
+ (+5V oder +12V) |
Gemeinsamer Plus-Pol (Common Anode). An die Stromversorgung anschließen |
R |
Rot-Kanal, gegen Masse geschaltet |
G |
Grün-Kanal, gegen Masse geschaltet |
B |
Blau-Kanal, gegen Masse geschaltet |
- Der Streifen ist Common Anode: Eine Farbe leuchtet, wenn ihr Pad auf Masse gezogen wird. Deshalb wird jede Farbe über einen Transistor oder MOSFET angesteuert und nicht direkt von einem GPIO.
- Die Reihenfolge der Pads ist nicht bei jedem Streifen gleich (zum Beispiel
+ G R Boder+ R G B). Lies die auf dem Streifen neben den Pads aufgedruckten Beschriftungen. - Prüfe die auf dem Streifen aufgedruckte Spannung. 5V- und 12V-Streifen sehen gleich aus.
- „5050“ ist die Größe jedes LED-Gehäuses: 5,0 mm x 5,0 mm. Jedes Gehäuse enthält eine rote, eine grüne und eine blaue LED.
Verdrahtung
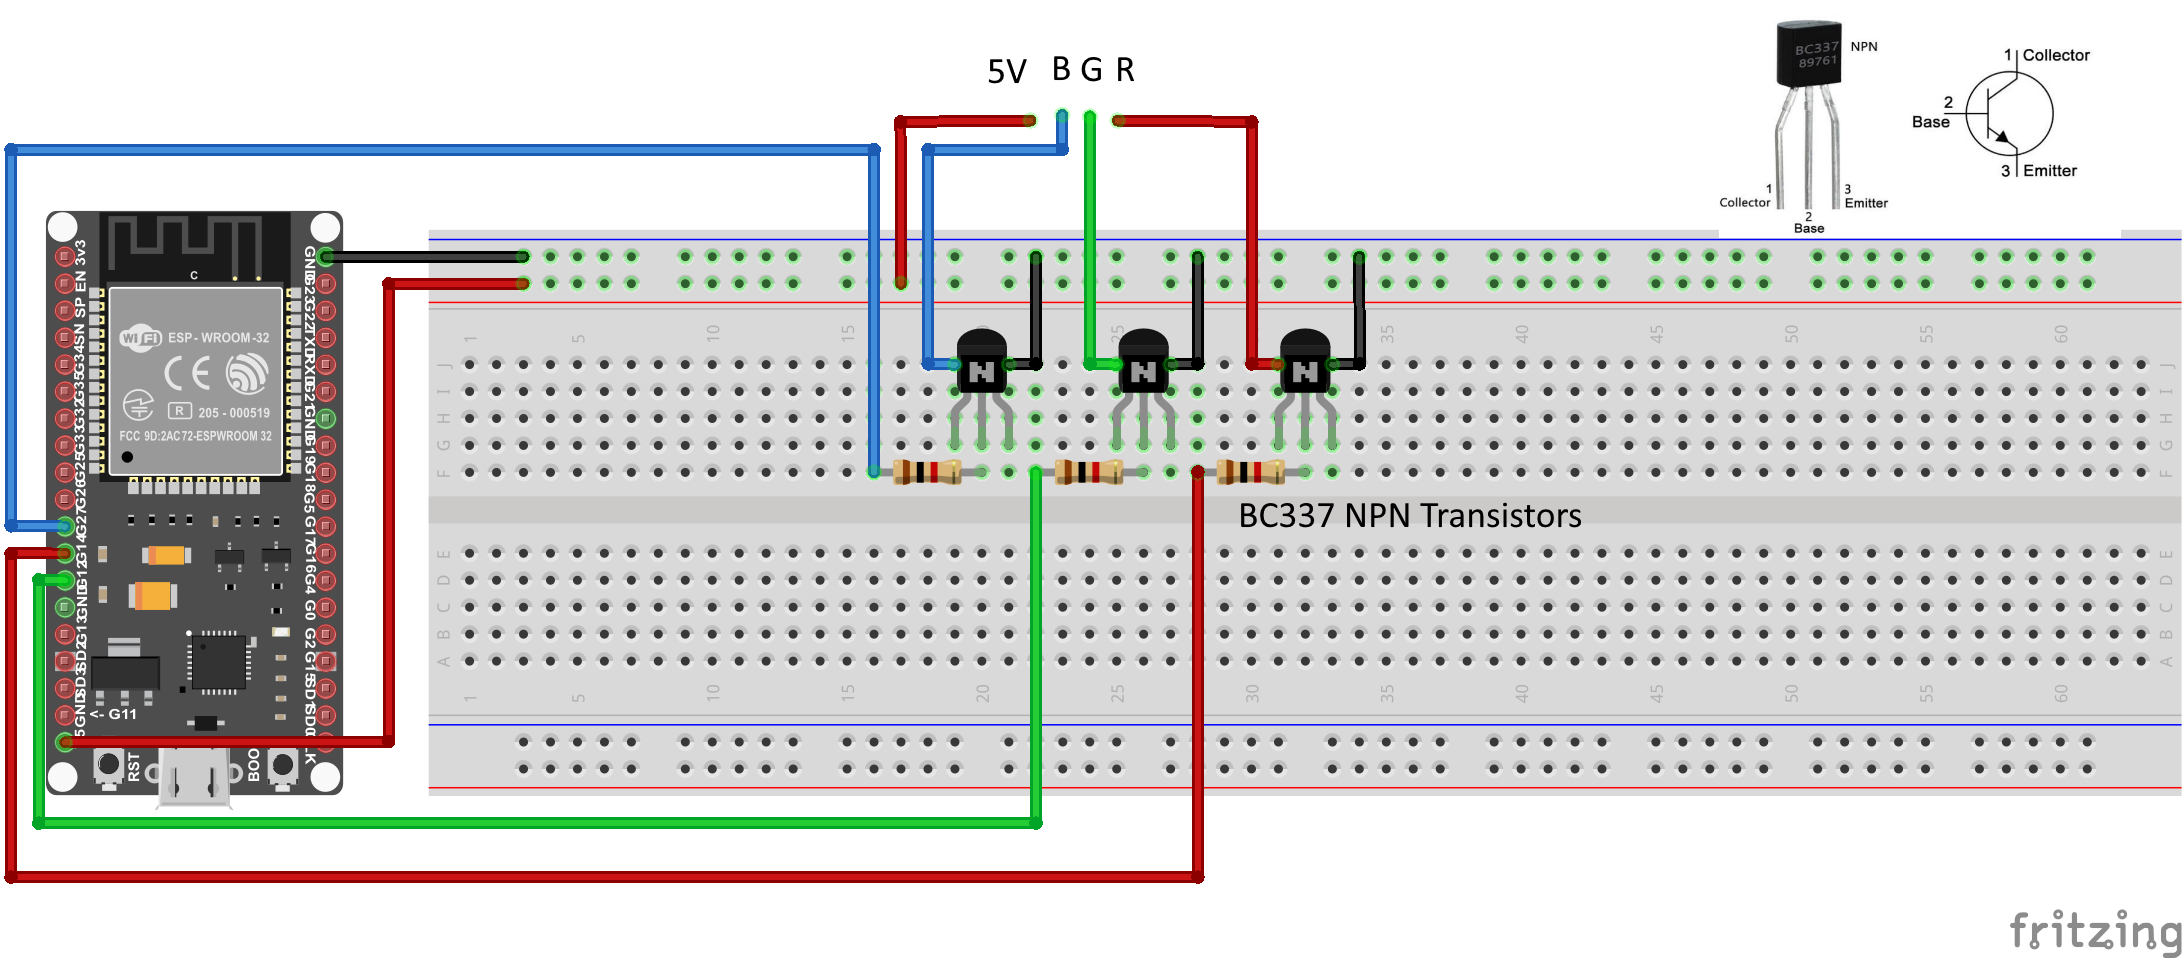
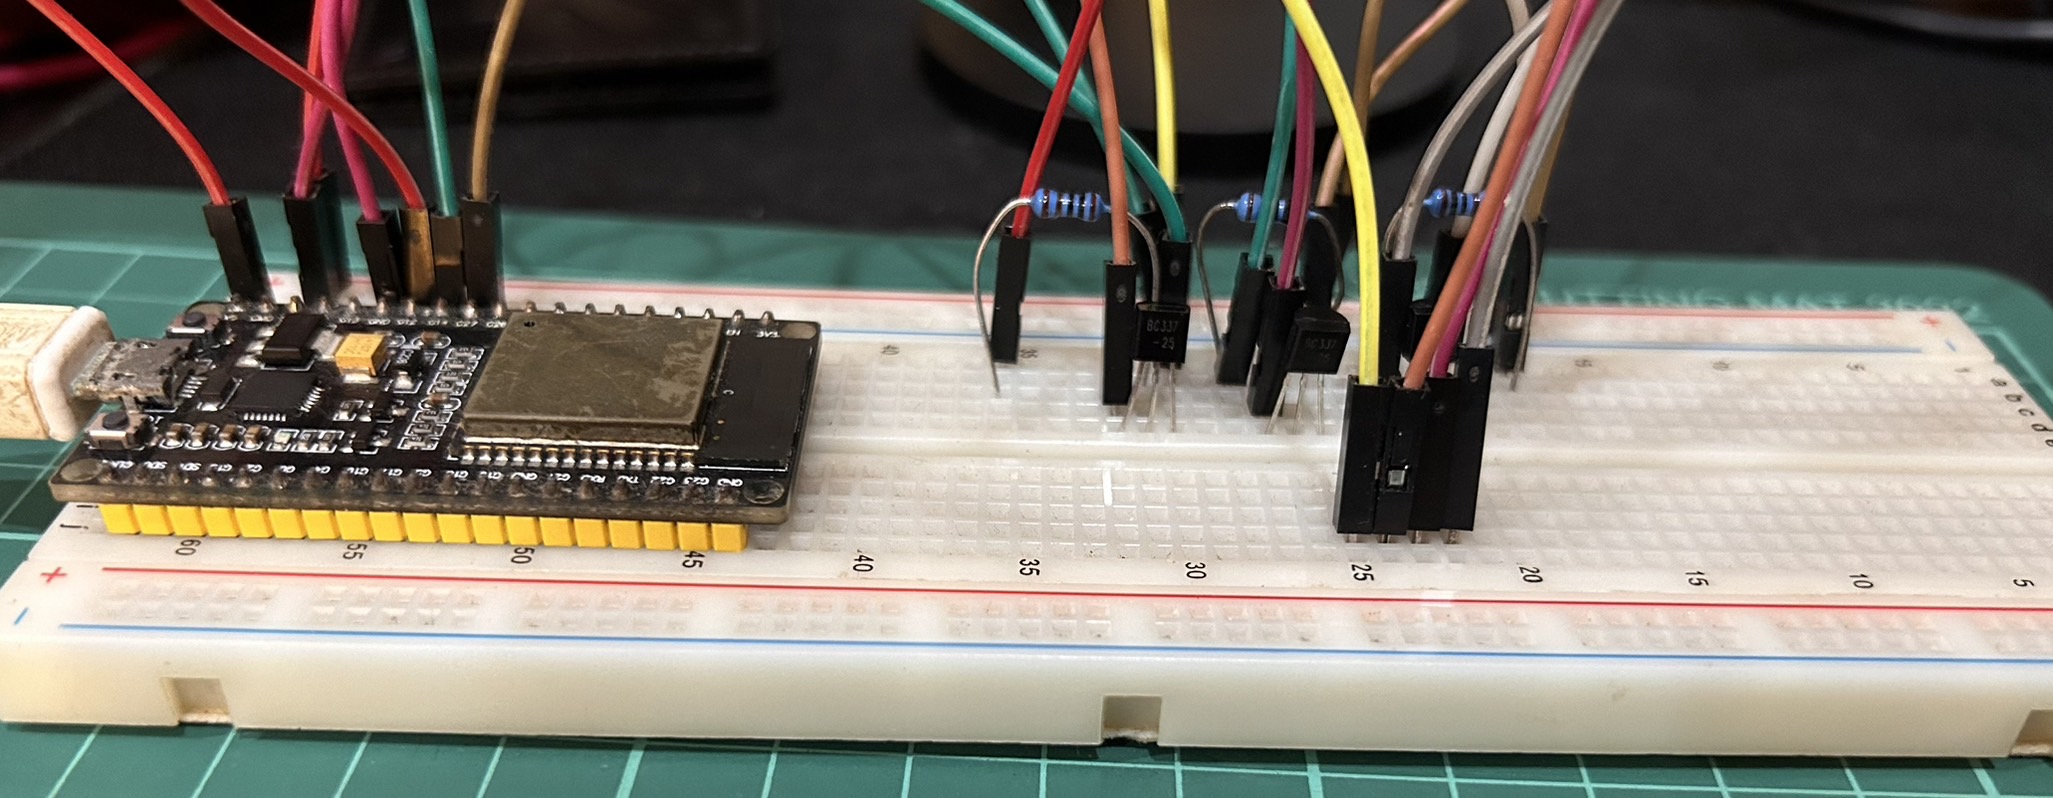
| Streifen | ESP32 PIN |
|---|---|
| 5V | 5V |
| R | 14 |
| G | 12 |
| B | 27 |
Prüfen wir, ob der LED-Streifen richtig verdrahtet ist und funktioniert.
// Red, green, and blue pins for PWM control
const int ledR = 14;
const int ledG = 12;
const int bluePin = 27;

uint8_t color = 0;          // a value from 0 to 255 representing the hue
uint32_t R, G, B;           // the Red Green and Blue color components
uint8_t brightness = 255;  // 255 is maximum brightness, but can be changed.  Might need 256 for common anode to fully turn off.
bool invert = false;

void hueToRGB(uint8_t hue, uint8_t brightness);

void setup() {
  Serial.begin(115200);
  delay(10);

  ledcAttachPin(ledR, 1);
  ledcAttachPin(ledG, 2);
  ledcAttachPin(ledB, 3);

  // Initialize channels
  // channels 0-15, resolution 1-16 bits, freq limits depend on resolution
  // ledcSetup(uint8_t channel, uint32_t freq, uint8_t resolution_bits);
  ledcSetup(1, 12000, 8); // 12 kHz PWM, 8-bit resolution
  ledcSetup(2, 12000, 8);
  ledcSetup(3, 12000, 8);
}

void loop(){
   for (color = 0; color < 255; color++) { // Slew through the color spectrum
    hueToRGB(color, brightness);  // call function to convert hue to RGB

    // write the RGB values to the pins
    ledcWrite(1, R); // write red component to channel 1, etc.
    ledcWrite(2, G);
    ledcWrite(3, B);

    delay(100); // full cycle of rgb over 256 colors takes 26 seconds
 }
}

// Courtesy http://www.instructables.com/id/How-to-Use-an-RGB-LED/?ALLSTEPS
// function to convert a color to its Red, Green, and Blue components.

void hueToRGB(uint8_t hue, uint8_t brightness) {
    uint16_t scaledHue = (hue * 6);
    uint8_t segment = scaledHue / 256; // segment 0 to 5 around the
                                            // color wheel
    uint16_t segmentOffset =
      scaledHue - (segment * 256); // position within the segment

    uint8_t complement = 0;
    uint16_t prev = (brightness * ( 255 -  segmentOffset)) / 256;
    uint16_t next = (brightness *  segmentOffset) / 256;

    if(invert)
    {
      brightness = 255 - brightness;
      complement = 255;
      prev = 255 - prev;
      next = 255 - next;
    }

    switch(segment ) {
    case 0:      // red
        R = brightness;
        G = next;
        B = complement;
    break;
    case 1:     // yellow
        R = prev;
        G = brightness;
        B = complement;
    break;
    case 2:     // green
        R = complement;
        G = brightness;
        B = next;
    break;
    case 3:    // cyan
        R = complement;
        G = prev;
        B = brightness;
    break;
    case 4:    // blue
        R = next;
        G = complement;
        B = brightness;
    break;
   case 5:      // magenta
    default:
        R = brightness;
        G = complement;
        B = prev;
    break;
    }
}
Diesen Code auf GitHub Gist ansehen
Der LED-Streifen wechselt die Farben so:
Schritt 1 : Ein neues Gerät in Sinric Pro anlegen
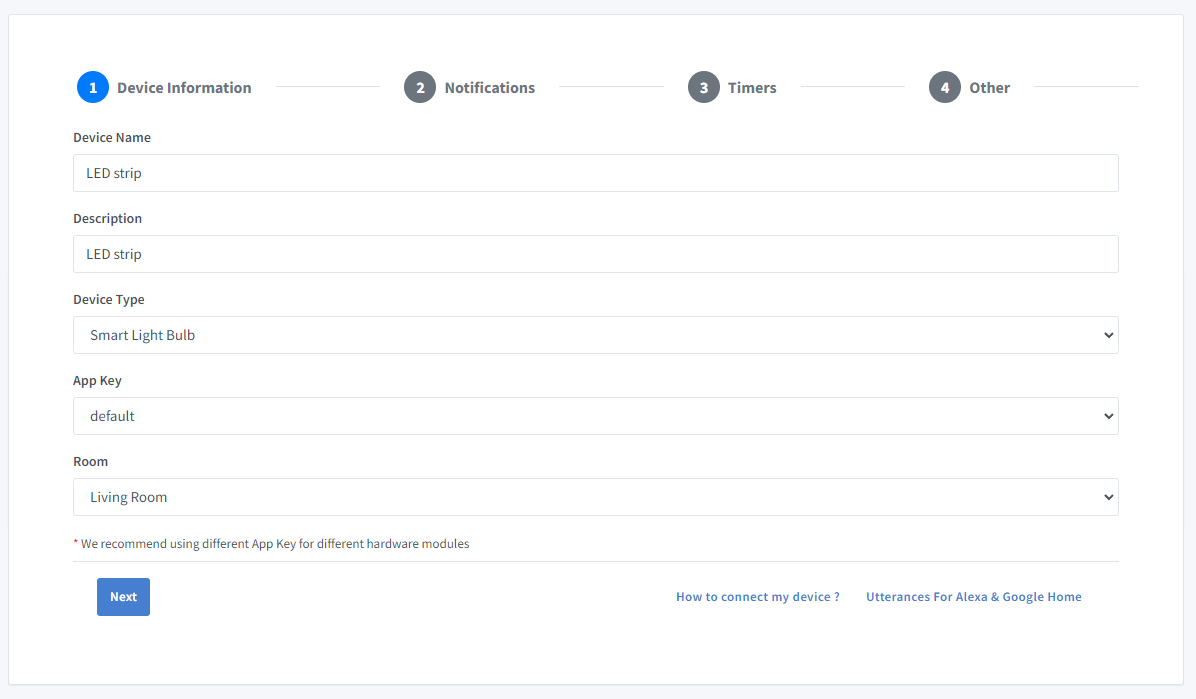
- Melde dich an bei deinem Sinric Pro Konto, gehe links im Menü zu Devices und klicke oben links auf Add Device.
- Gib den Gerätenamen LED strip, die Beschreibung My LED strip ein und wähle als Gerätetyp Smart Light Bulb.
-
Klicke im Tab Notifications auf Next
-
Klicke auf den Tab Others und dann auf Save
-
Der nächste Bildschirm zeigt die Zugangsdaten, die du brauchst, um das gerade erstellte Gerät zu verbinden.
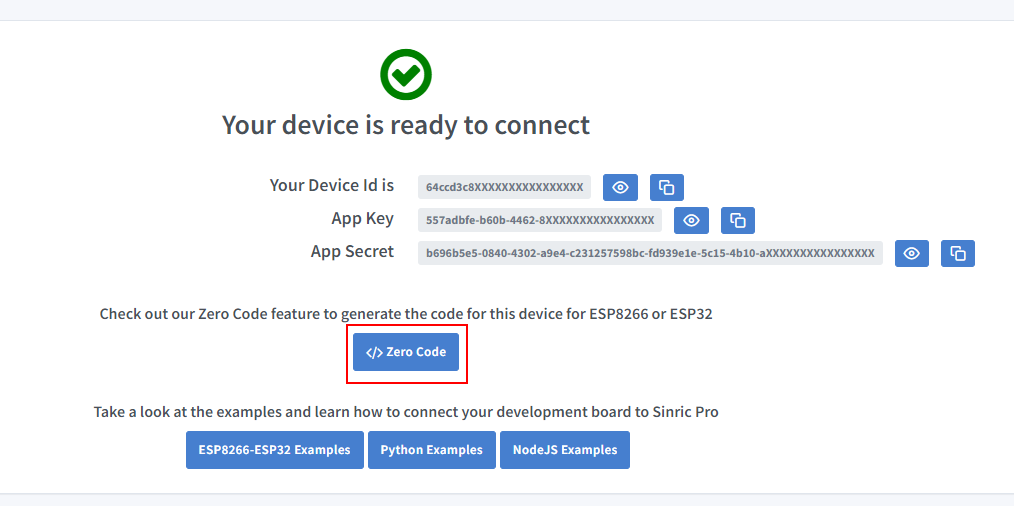
- Kopiere Device Id, App Key und App Secret Halte diese Werte geheim. TEILE SIE NICHT IN ÖFFENTLICHEN FOREN!
Schritt 2 : Mit Sinric Pro verbinden
Schritt 2.1 Sinric Pro Bibliothek installieren

2.2 Vollständiger Code
// Uncomment the following line to enable serial debug output
//#define ENABLE_DEBUG

#ifdef ENABLE_DEBUG
    #define DEBUG_ESP_PORT Serial
    #define NODEBUG_WEBSOCKETS
    #define NDEBUG
#endif

#include <Arduino.h>
#if defined(ESP8266)
  #include <ESP8266WiFi.h>
#elif defined(ESP32) || defined(ARDUINO_ARCH_RP2040)
  #include <WiFi.h>
#endif

#include <SinricPro.h>
#include <SinricProLight.h>

#include <map>

#define WIFI_SSID  ""
#define WIFI_PASS  ""
#define APP_KEY    ""     // Should look like "de0bxxxx-1x3x-4x3x-ax2x-5dabxxxxxxxx"
#define APP_SECRET ""  // Should look like "5f36xxxx-x3x7-4x3x-xexe-e86724a9xxxx-4c4axxxx-3x3x-x5xe-x9x3-333d65xxxxxx"
#define LIGHT_ID   ""   // Should look like "5dc1564130xxxxxxxxxxxxxx"
#define BAUD_RATE  115200              // Change baudrate to your need for serial log

#define BLUE_PIN  27  // PIN for BLUE BC337 NPN transistor  - change this to your need (D5 = GPIO14 on ESP8266)
#define RED_PIN   14  // PIN for RED BC337 NPN transistor   - change this to your need (D6 = GPIO12 on ESP8266)
#define GREEN_PIN 12  // PIN for GREEN BC337 NPN transistor - change this to your need (D7 = GPIO13 on ESP8266)

struct Color {
    uint8_t r;
    uint8_t g;
    uint8_t b;
};

// Colortemperature lookup table
using ColorTemperatures = std::map<uint16_t, Color>;
ColorTemperatures colorTemperatures{
    //   {Temperature value, {color r, g, b}}
    {2000, {255, 138, 18}},
    {2200, {255, 147, 44}},
    {2700, {255, 169, 87}},
    {3000, {255, 180, 107}},
    {4000, {255, 209, 163}},
    {5000, {255, 228, 206}},
    {5500, {255, 236, 224}},
    {6000, {255, 243, 239}},
    {6500, {255, 249, 253}},
    {7000, {245, 243, 255}},
    {7500, {235, 238, 255}},
    {9000, {214, 225, 255}}};

struct DeviceState {                                   // Stores current device state with following initial values:
    bool  powerState       = false;                    // initial state is off
    Color color            = colorTemperatures[9000];  // color is set to white (9000k)
    int   colorTemperature = 9000;                     // color temperature is set to 9000k
    int   brightness       = 100;                      // brightness is set to 100
} device_state;

SinricProLight& myLight = SinricPro[LIGHT_ID];  // SinricProLight device

void setStripe() {
    int rValue = map(device_state.color.r * device_state.brightness, 0, 255 * 100, 0, 1023);  // calculate red value and map between 0 and 1023 for analogWrite
    int gValue = map(device_state.color.g * device_state.brightness, 0, 255 * 100, 0, 1023);  // calculate green value and map between 0 and 1023 for analogWrite
    int bValue = map(device_state.color.b * device_state.brightness, 0, 255 * 100, 0, 1023);  // calculate blue value and map between 0 and 1023 for analogWrite

    if (device_state.powerState == false) {  // turn off?
        analogWrite(RED_PIN, LOW);
        analogWrite(GREEN_PIN, LOW);
        analogWrite(BLUE_PIN, LOW);
    } else {
        analogWrite(RED_PIN, rValue);    // write red value to pin
        analogWrite(GREEN_PIN, gValue);  // write green value to pin
        analogWrite(BLUE_PIN, bValue);   // write blue value to pin
    }
}

bool onPowerState(const String& deviceId, bool& state) {
    device_state.powerState = state;  // store the new power state
    setStripe();                      // update the BC337 NPN transistors
    return true;
}

bool onBrightness(const String& deviceId, int& brightness) {
    device_state.brightness = brightness;  // store new brightness level
    setStripe();                           // update the BC337 NPN transistors
    return true;
}

bool onAdjustBrightness(const String& deviceId, int& brightnessDelta) {
    device_state.brightness += brightnessDelta;  // calculate and store new absolute brightness
    brightnessDelta = device_state.brightness;   // return absolute brightness
    setStripe();                                 // update the BC337 NPN transistors
    return true;
}

bool onColor(const String& deviceId, byte& r, byte& g, byte& b) {
    device_state.color.r = r;  // store new red value
    device_state.color.g = g;  // store new green value
    device_state.color.b = b;  // store new blue value
    setStripe();               // update the BC337 NPN transistors
    return true;
}

bool onColorTemperature(const String& deviceId, int& colorTemperature) {
    device_state.color            = colorTemperatures[colorTemperature];  // set rgb values from corresponding colortemperauture
    device_state.colorTemperature = colorTemperature;                     // store the current color temperature
    setStripe();                                                          // update the BC337 NPN transistors
    return true;
}

bool onIncreaseColorTemperature(const String& devceId, int& colorTemperature) {
    auto current = colorTemperatures.find(device_state.colorTemperature);  // get current entry from colorTemperature map
    auto next    = std::next(current);                                     // get next element
    if (next == colorTemperatures.end()) next = current;                   // prevent past last element
    device_state.color            = next->second;                          // set color
    device_state.colorTemperature = next->first;                           // set colorTemperature
    colorTemperature              = device_state.colorTemperature;         // return new colorTemperature
    setStripe();
    return true;
}

bool onDecreaseColorTemperature(const String& devceId, int& colorTemperature) {
    auto current = colorTemperatures.find(device_state.colorTemperature);  // get current entry from colorTemperature map
    auto next    = std::prev(current);                                     // get previous element
    if (next == colorTemperatures.end()) next = current;                   // prevent before first element
    device_state.color            = next->second;                          // set color
    device_state.colorTemperature = next->first;                           // set colorTemperature
    colorTemperature              = device_state.colorTemperature;         // return new colorTemperature
    setStripe();
    return true;
}

void setupWiFi() {
    Serial.printf("WiFi: connecting");

    #if defined(ESP8266)
        WiFi.setSleepMode(WIFI_NONE_SLEEP);
        WiFi.setAutoReconnect(true);
    #elif defined(ESP32)
        WiFi.setSleep(false);
        WiFi.setAutoReconnect(true);
    #endif

    WiFi.begin(WIFI_SSID, WIFI_PASS);

    while (WiFi.status() != WL_CONNECTED) {
        Serial.printf(".");
        delay(250);
    }
    Serial.printf("connected\r\nIP is %s\r\n", WiFi.localIP().toString().c_str());
}

void setupSinricPro() {
    myLight.onPowerState(onPowerState);                              // assign onPowerState callback
    myLight.onBrightness(onBrightness);                              // assign onBrightness callback
    myLight.onAdjustBrightness(onAdjustBrightness);                  // assign onAdjustBrightness callback
    myLight.onColor(onColor);                                        // assign onColor callback
    myLight.onColorTemperature(onColorTemperature);                  // assign onColorTemperature callback
    myLight.onDecreaseColorTemperature(onDecreaseColorTemperature);  // assign onDecreaseColorTemperature callback
    myLight.onIncreaseColorTemperature(onIncreaseColorTemperature);  // assign onIncreaseColorTemperature callback

    SinricPro.begin(APP_KEY, APP_SECRET);  // start SinricPro
}

void setup() {
    Serial.begin(BAUD_RATE);  // setup serial

    pinMode(RED_PIN, OUTPUT);    // set red-BC337 NPN transistor pin as output
    pinMode(GREEN_PIN, OUTPUT);  // set green-BC337 NPN transistor pin as output
    pinMode(BLUE_PIN, OUTPUT);   // set blue-BC337 NPN transistor pin as output

    setupWiFi();       // connect wifi
    setupSinricPro();  // setup SinricPro
}

void loop() {
    SinricPro.handle();  // handle SinricPro communication
}
Diesen Code auf GitHub Gist ansehen
Jetzt kannst du den Streifen auch über Alexa, GoogleHome und SmartThings steuern.
Fehlerbehebung
-
Verwende ein Netzteil, das genug Strom für den LED-Streifen liefern kann. LED-Streifen können viel Strom verbrauchen, deshalb ist es wichtig, ein Netzteil zu verwenden, das den Strombedarf des Streifens deckt.
-
Mehr Details findest du auf unserer Seite Troubleshooting.
Verwandte Tutorials
- ESP32 oder ESP8266 mit Alexa und Google Home steuern
- Dimmbarer Schalter mit einem RobotDyn AC Lichtdimmer
- Dimmbarer Schalter mit einem YYAC-3S Modul
- Switch-Tutorial Teil 1: ein Relais ein- und ausschalten
This document is open source. See a typo? Please create an issue