

Build an Air Quality Sensor with a MQ135 Sensor to detect smoke and other harmful gas for Alexa
In this section, we will walk you through creating an air quality sensor using ESP32 or ESP8266. You will then be able to view the air quality via Amazon Alexa and receive a push notification via the Sinric Pro app when the air quality drops below a certain threshold level.
Prerequisites :
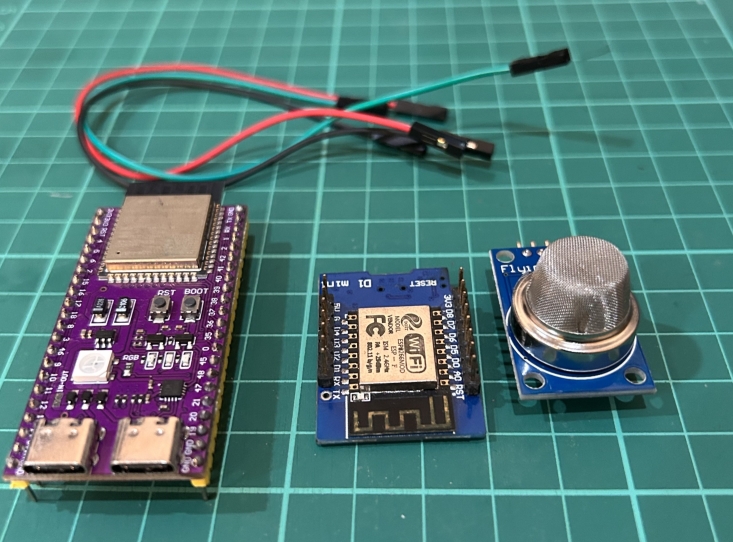
- ESP32, ESP8266 x 1.
- MQ135 x 1.
- Jumper Wires.
Quick introduction to MQ135
The MQ135 is a semiconductor gas sensor that is commonly used in air quality control equipment. It is sensitive to a wide range of gases, including ammonia, sulfide, benzene, and smoke. The sensor has two outputs: a digital output that goes high when the gas concentration exceeds a certain threshold, and an analog output that provides a voltage proportional to the gas concentration.
The MQ135 sensor requires a power supply of 5V and consumes about 150mA of current. The digital output can be connected to a ESP32, ESP8266 or Pico W to measure the gas concentration.
How to calibrate the sensor ? Put your sensor outside where there is enough fresh air (ideally at 20°C & 33% humidity according to the datasheet) and leave it powered on for 12-24 hours to burn it in and stabilize.
Specification sheet: SNS-MQ135
Wiring
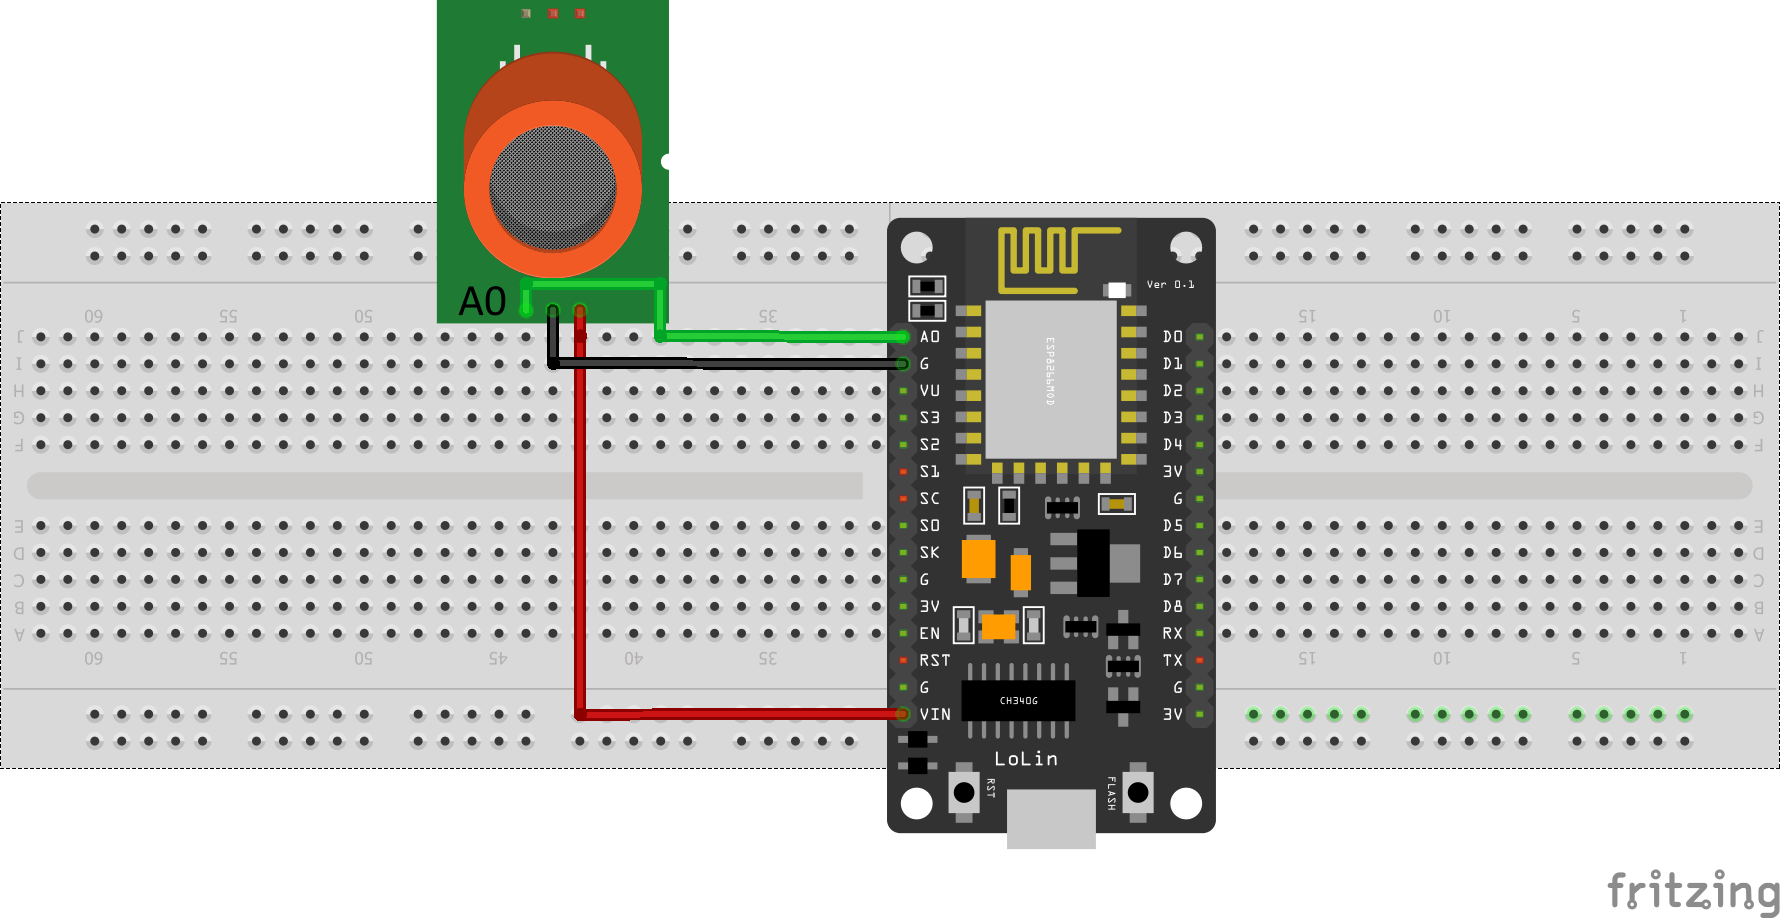
| MCU | A0 Pin | VCC Pin |
|---|---|---|
| ESP32 | 34 (Analog ADC1_CH6) | 5V |
| ESP8266 | A0 | 5V/VIN |
| Pico W | GP26 (ADC0) | 5V |
Note: on ESP32, ADC2 (GPIO04, GPIO02, GPIO15) is unstable when Wi-Fi is being used.
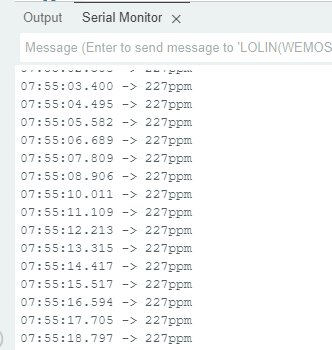
Let’s verify that motion sensor is wired correctly and working.
Arduino IDE Serial Monitor will show the motion detections like this:
Detecting poor Air Quality
Step 1 : Connect to Sinric Pro
Step 1.1 : Creating a custom device type for Air Quality Sensor.
Sinric Pro does not have a built-in device type for Air Quality Sensor with PPM so we are going to create a custom device type for Water Sensor using Device Template feature to achieve.
-
PPM Value
-
Air Quality Is Severe, Very Poor, Poor, Moderate or Good.
Note: You can use the device template import feature mentioned below to skip creating the full template.
-
Login to your Sinric Pro account and goto Device Templates
-
Click Add Device Template. Enter name and description as Air Quality Sensor and select Air Quality Sensor as device type

- Click Capabilities.
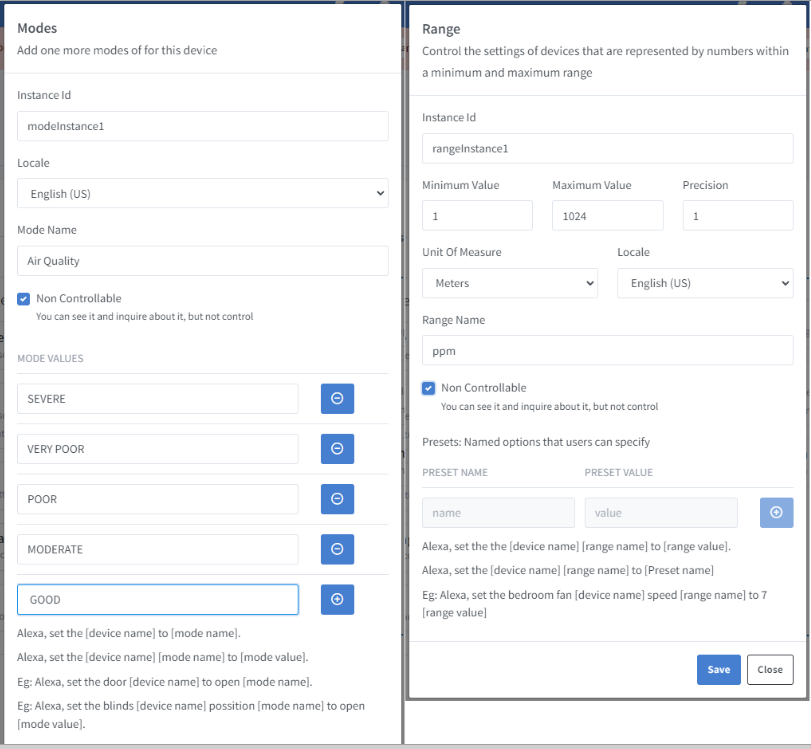
Here we must select the features of our Air Quality Sensor. We want to know whether Air Quality is Severe, Very Poor, Poor, Moderate or Good. So let’s drag a Range, a Mode and Push Notification capability.

-
What’s Range capability?
Range capability can be use to represents a number. eg: current speed of a blender.
-
What’s Mode capability?
Mode capability can be use to represents a value out of list of predefined values. eg: current wash cycle mode of a washing machine.
-
What’s Push Notification capability?
Notification capability provides the ability to send a push notification message from the code.
Click on Configure button and setup the two capabilities like below.
Click on Save to save.
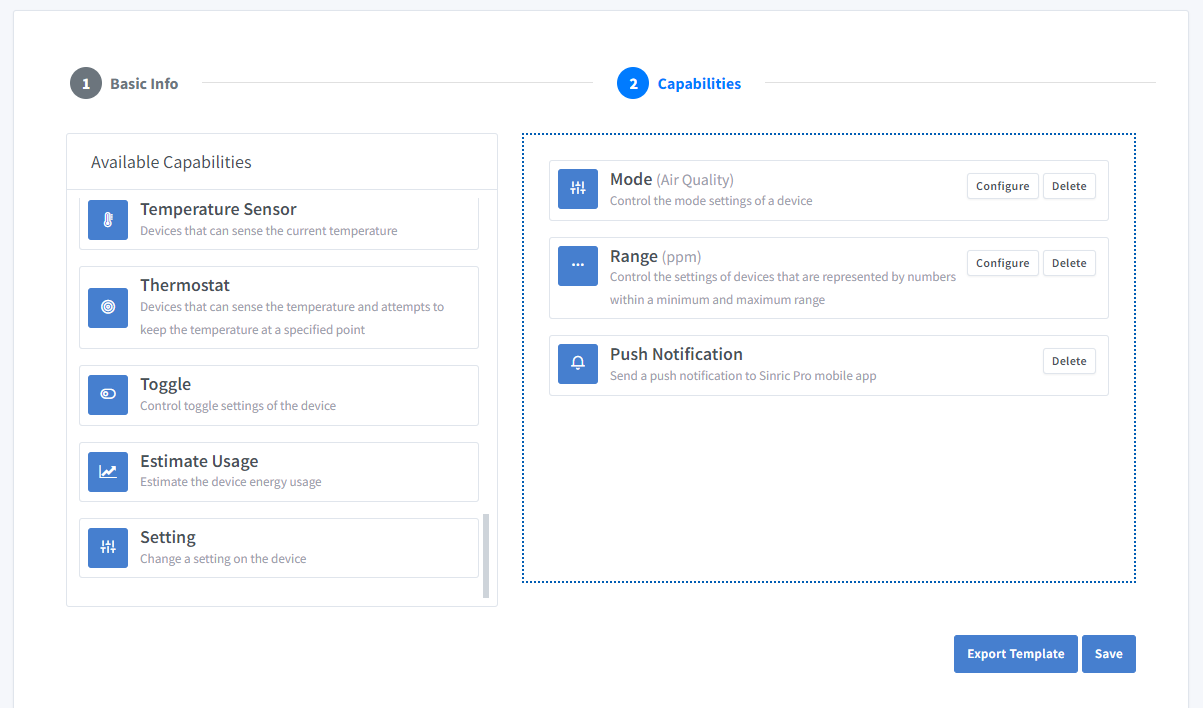
Click on Save to save the template.
Now you can see the template we just created.
Import an existing template?
If you are feeling lazy setup all the Modes and Range values, you can use the import feature.
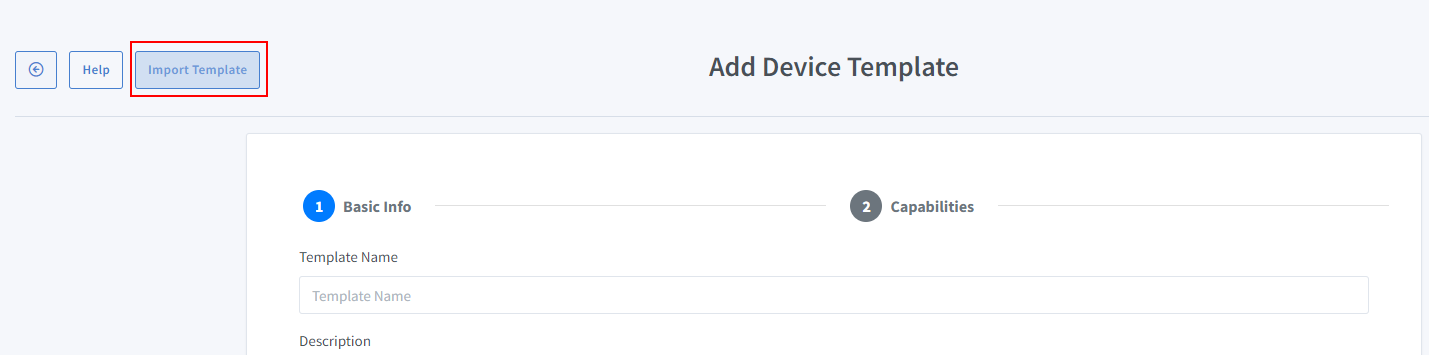
Paste this Template:
-
Login to your Sinric Pro account, go to Devices menu on your left and click Add Device button (On top left).
-
Enter the device name Air Quality Sensor, description Air Quality Sensor and select the device type as Air Quality Sensor from Your Device Templates.

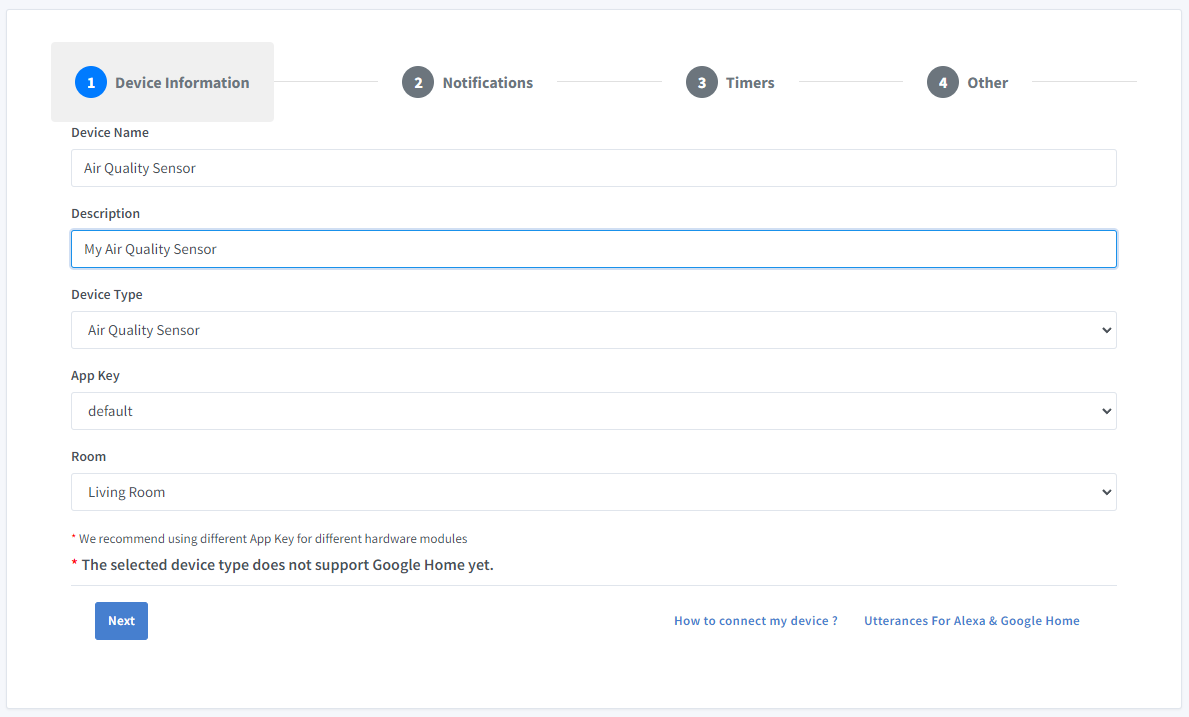
-
Click Others tab and Click Save
-
Next screen will show the credentials required to connect the device you just created.
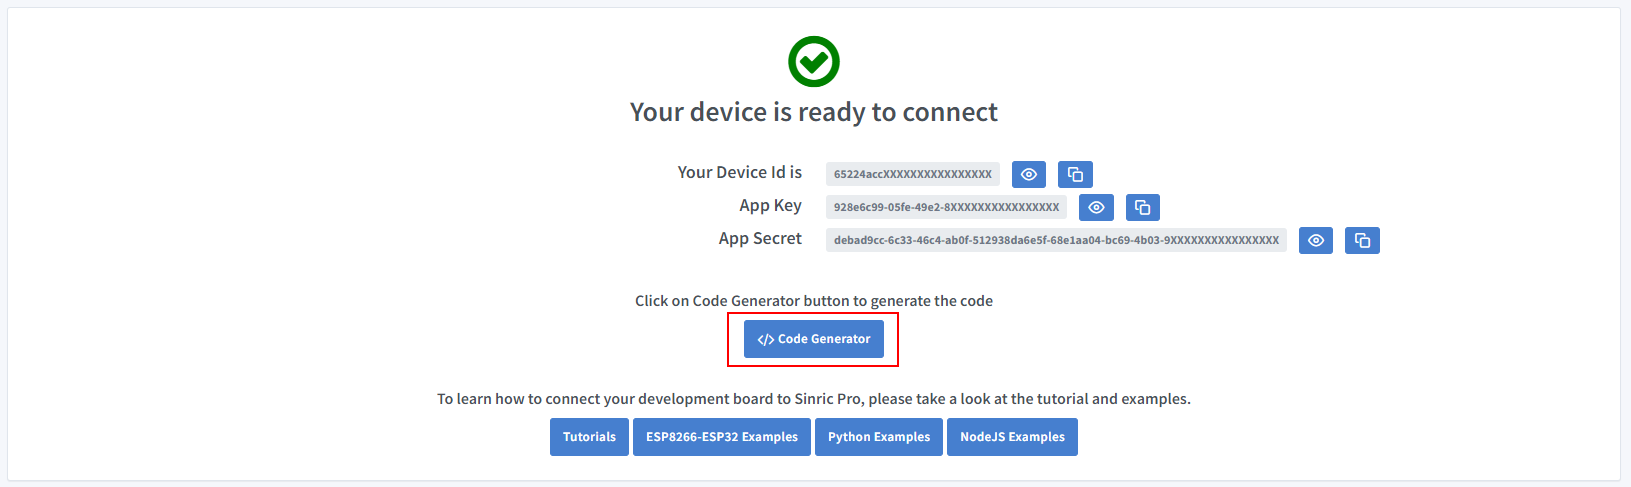
-
Copy the Device Id, App Key and App Secret Keep these values secure. DO NOT SHARE THEM ON PUBLIC FORUMS !
-
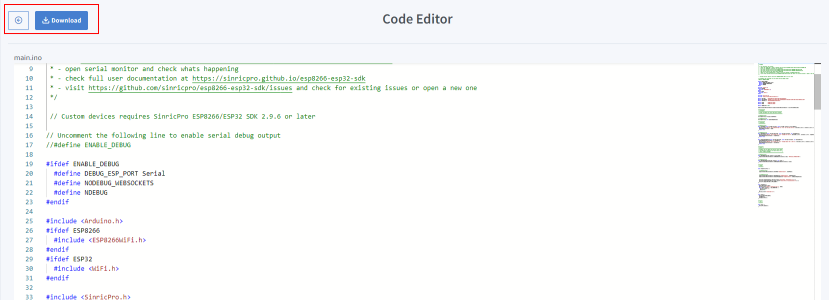
Click on Code Generator to Generate the code. Click on Download to download the code.
Step 2 : Connect to Sinric Pro
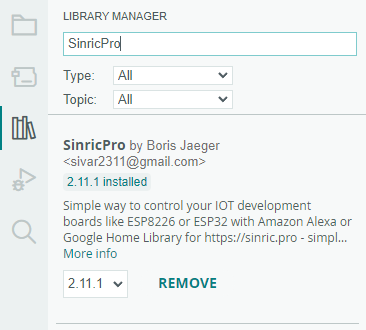
Step 2.1 Install Sinric Pro Library
Step 2.2 Install TroykaMQ
TroykaMQ is not available in Arduino Library Manager. So you must download it from https://github.com/amperka/TroykaMQ and copy it over to C:\Users\<your username>\Documents\Arduino\libraries
2.2 Complete Code
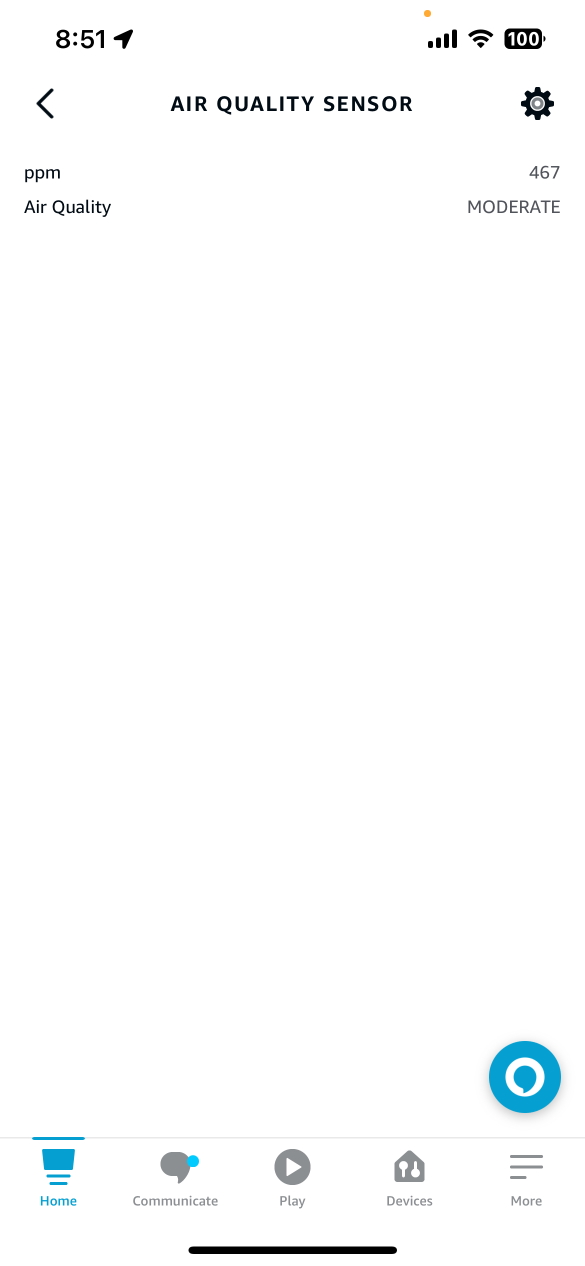
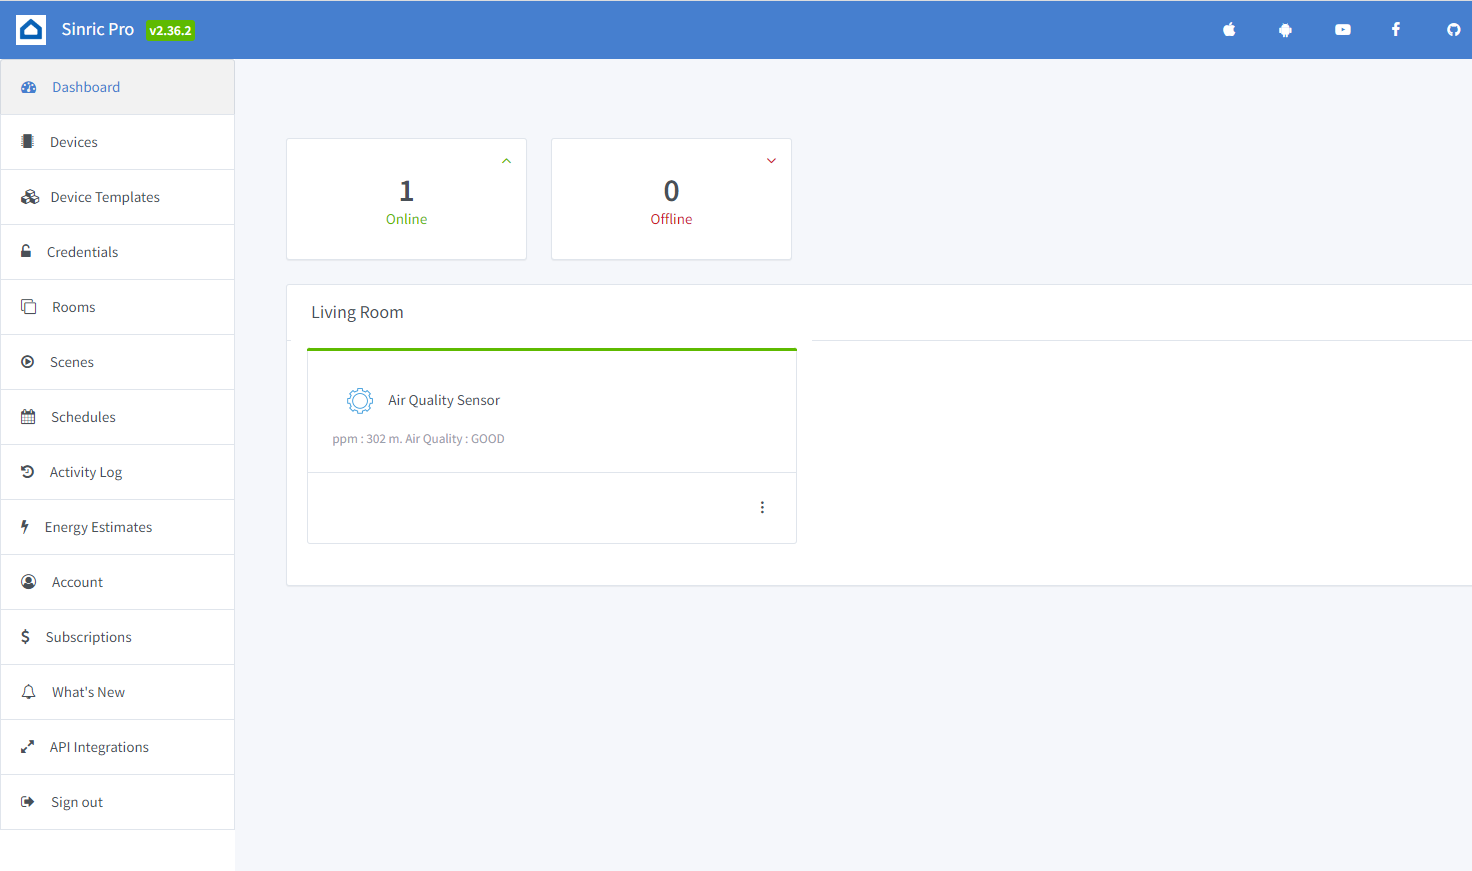
Now you should be able to see the air quality status and water level via Alexa, Sinric Pro App
Alexa, What’s the air quality (mode name) in air quality sensor(device name)
Alexa, What’s the ppm (range name) in air quality sensor(device name)
Step 3 : Voice Announcements!
✅ How it works:
1️⃣ Add a Switch in SinricPro (your secret trigger!)
2️⃣ Create an Alexa Routine that speaks your message when a “Air quality is bad!” when Switch turned on
3️⃣ Send a power state event to turn ON that switch from your code
void triggerVoiceAnnouncement() {
    SinricProSwitch& mySwitch = SinricPro[SWITCH_ID];
    mySwitch.sendPowerStateEvent(true);
}
Troubleshooting
-
Google Home or SmartThings are not Supported.
-
Please refer to our Troubleshooting page for more details.
This document is open source. See a typo? Please create an issue