Contact Sensor (MC-38) Tutorial for ESP8266, ESP32, Raspberry Pi Pico W
In this section, we will show you how to create a contact sensor (also known as a door sensor, entry sensor, or window sensor) using an ESP32, ESP8266 or Raspberry Pi Pico W, and then view the open/close state in Alexa, Google Home, SmartThings, or the Sinric Pro app.
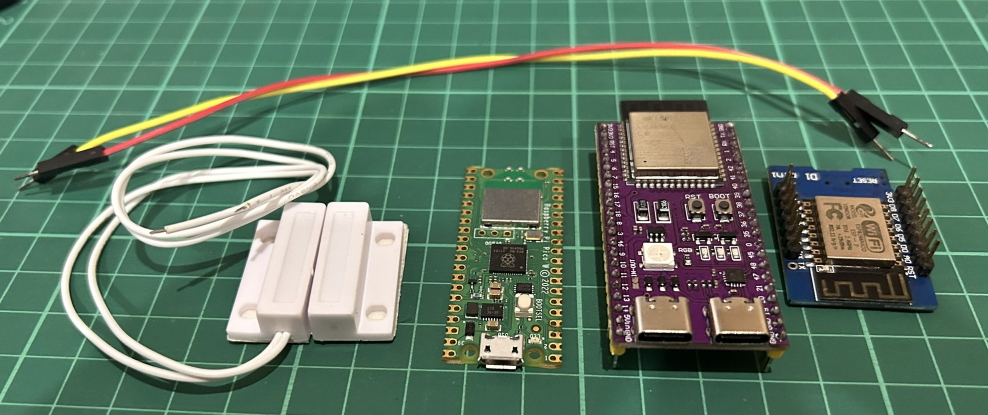
Prerequisites :
- ESP32, ESP8266 or Raspberry Pi Pico W x 1.
- Contact Sensor (MC-38) x 1.
- Jumper Wires.
Quick introduction to Contact Sensor
A contact sensor is a device that detects whether a door, window, or other object is open or closed. A contact sensor comprises two components – a sensor and a magnet – used to determine the status of objects such as doors or windows, whether they are open or closed.
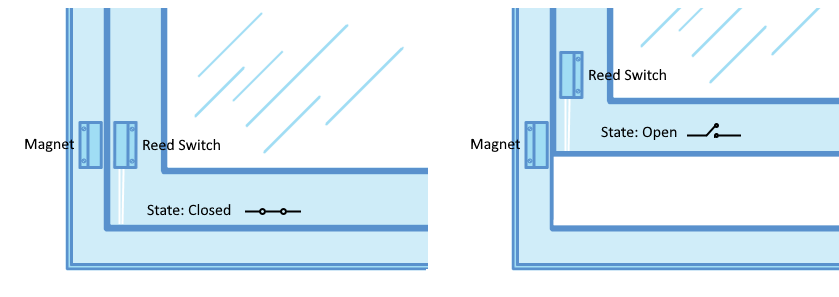
The sensor is affixed to the frame of the sliding window, while the magnet is attached to the window itself. When the sliding window is shut, the magnet comes into proximity with the sensor, establishing a connection between the two components. Conversely, when the sliding window is opened, the magnet moves away from the sensor, breaking the connection between them.
Wiring Contact Sensor
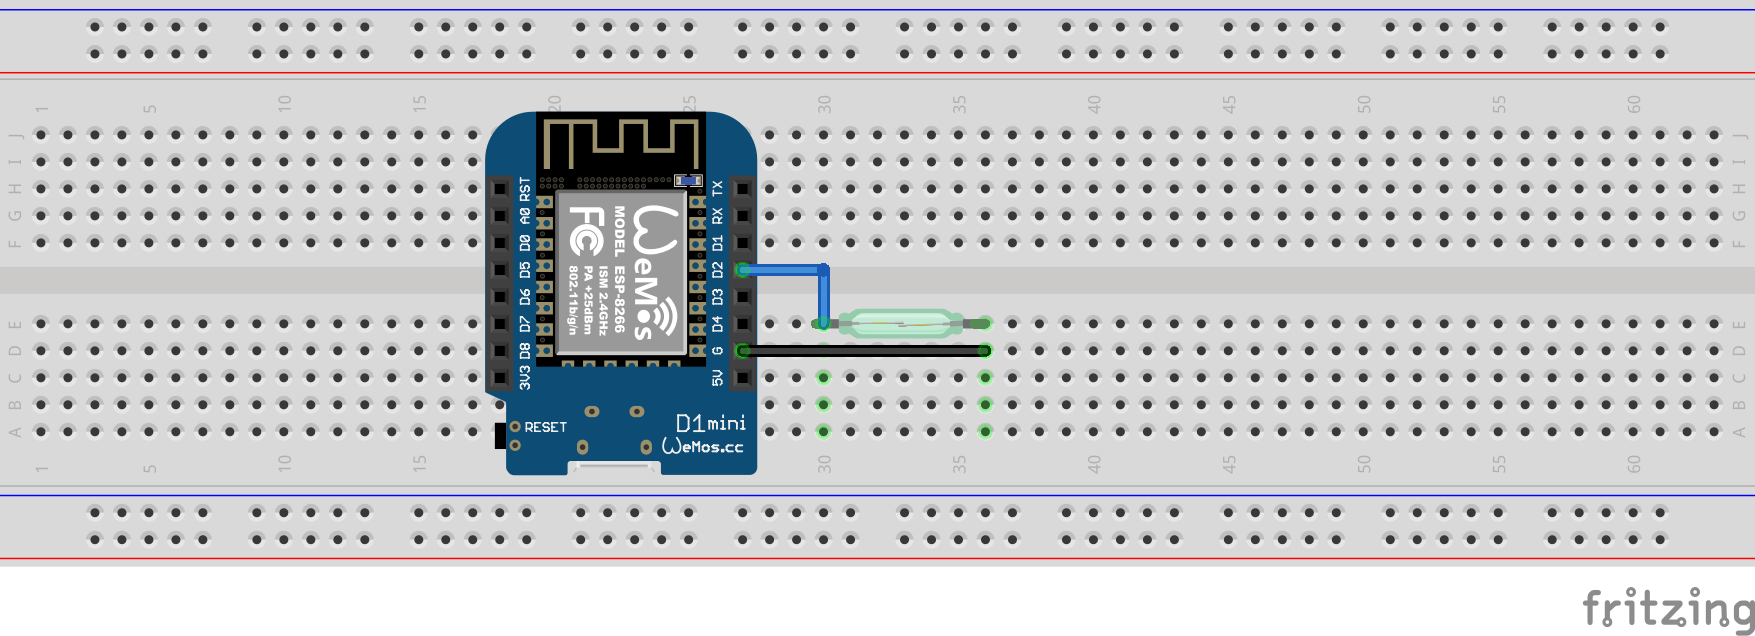
Note: We are using INPUT_PULLUP instead of connecting a 10kΩ resistor between the reed switch and GND.
| MCU | GPIO Pin |
|---|---|
| ESP32 | 19 |
| ESP8266 | 4 (D2) |
| Pico W | GP5 |
Let’s verify that contact sensor is wired correctly and working.
Step 1 : Create a new Contact Sensor in Sinric Pro
- Login to your Sinric Pro account, go to Devices menu on your left and click Add Device button (On top left).
- Enter the device name Front Door, description My Front Door and select the device type as Contact Sensor.
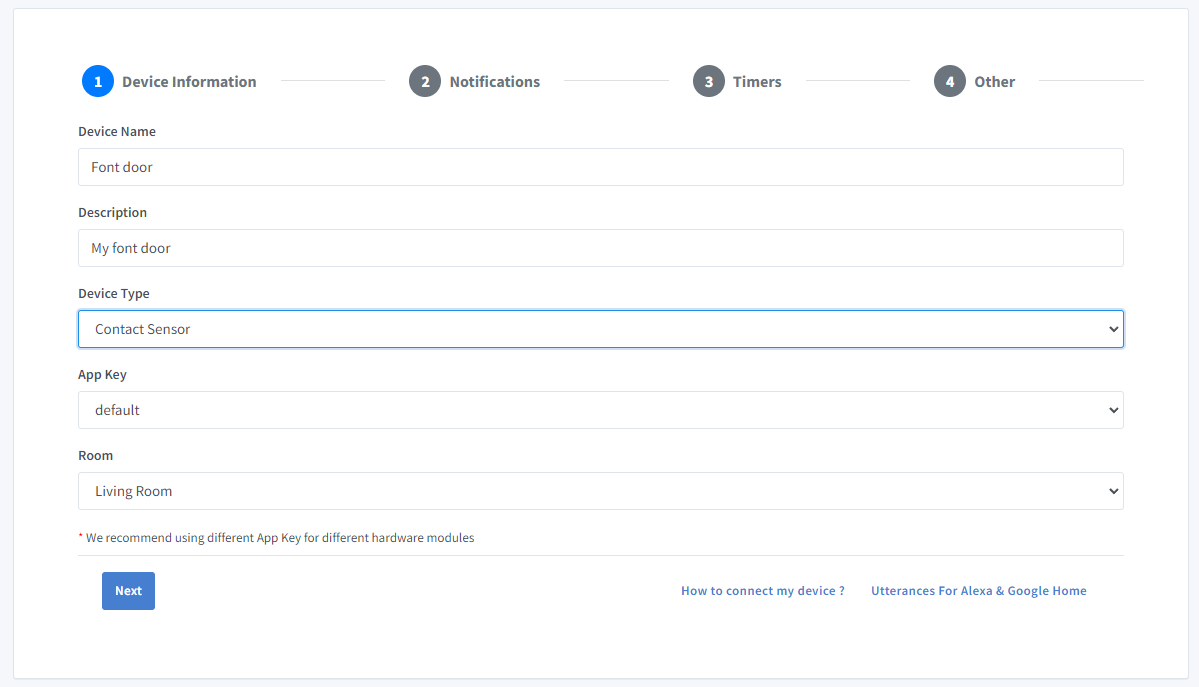
- Click Next the in the Notifications tab
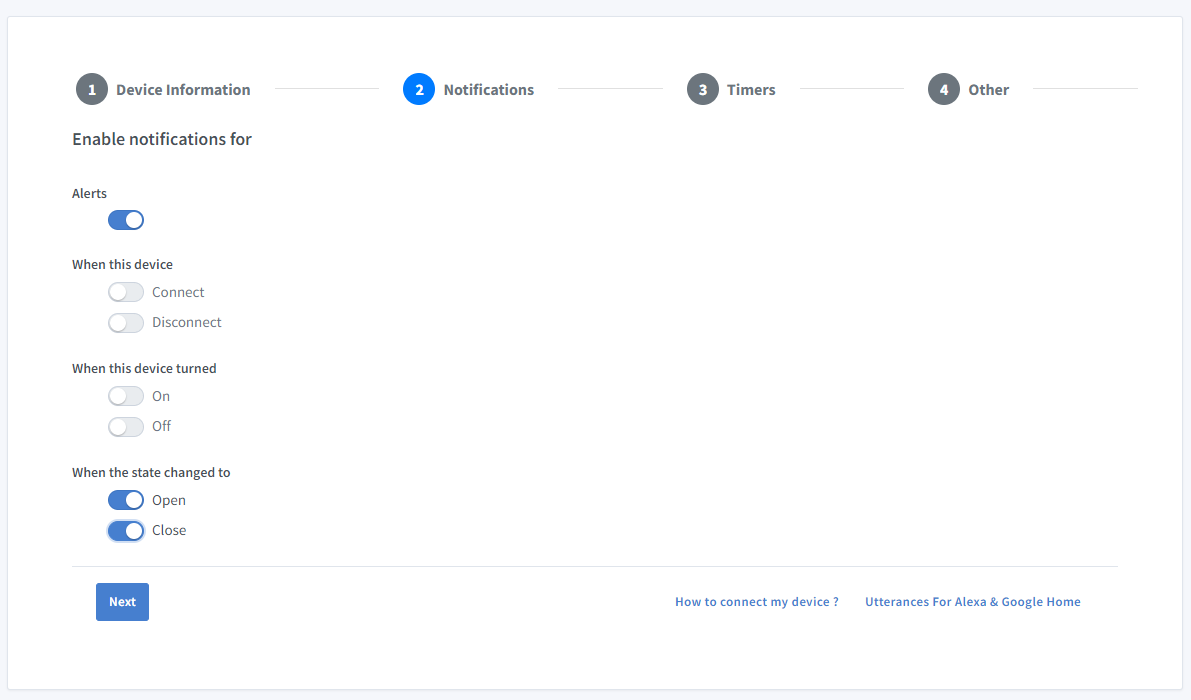
You can enable toggles for Open, Close here to receive a push notification via the Sinric Pro app when the contact sensor state change between Open or Close.
-
Click Others tab and Click Save
-
Next screen will show the credentials required to connect the device you just created.
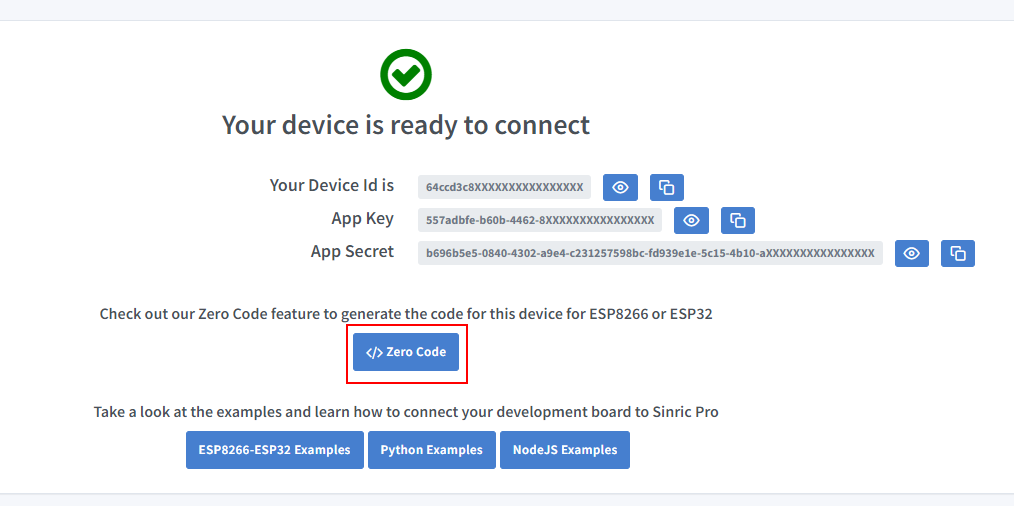
- Copy the Device Id, App Key and App Secret Keep these values secure. DO NOT SHARE THEM ON PUBLIC FORUMS !
Step 2 : Connect to Sinric Pro
Step 2.1 Install Sinric Pro Library
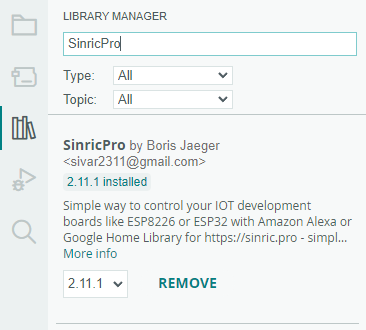
You can generate the code using Zero Code feature or write it by your self. If you do not have programming experice, we recommend to use Zero Code feature in the Portal to generate the code, download and flash.
2.2 Complete Code
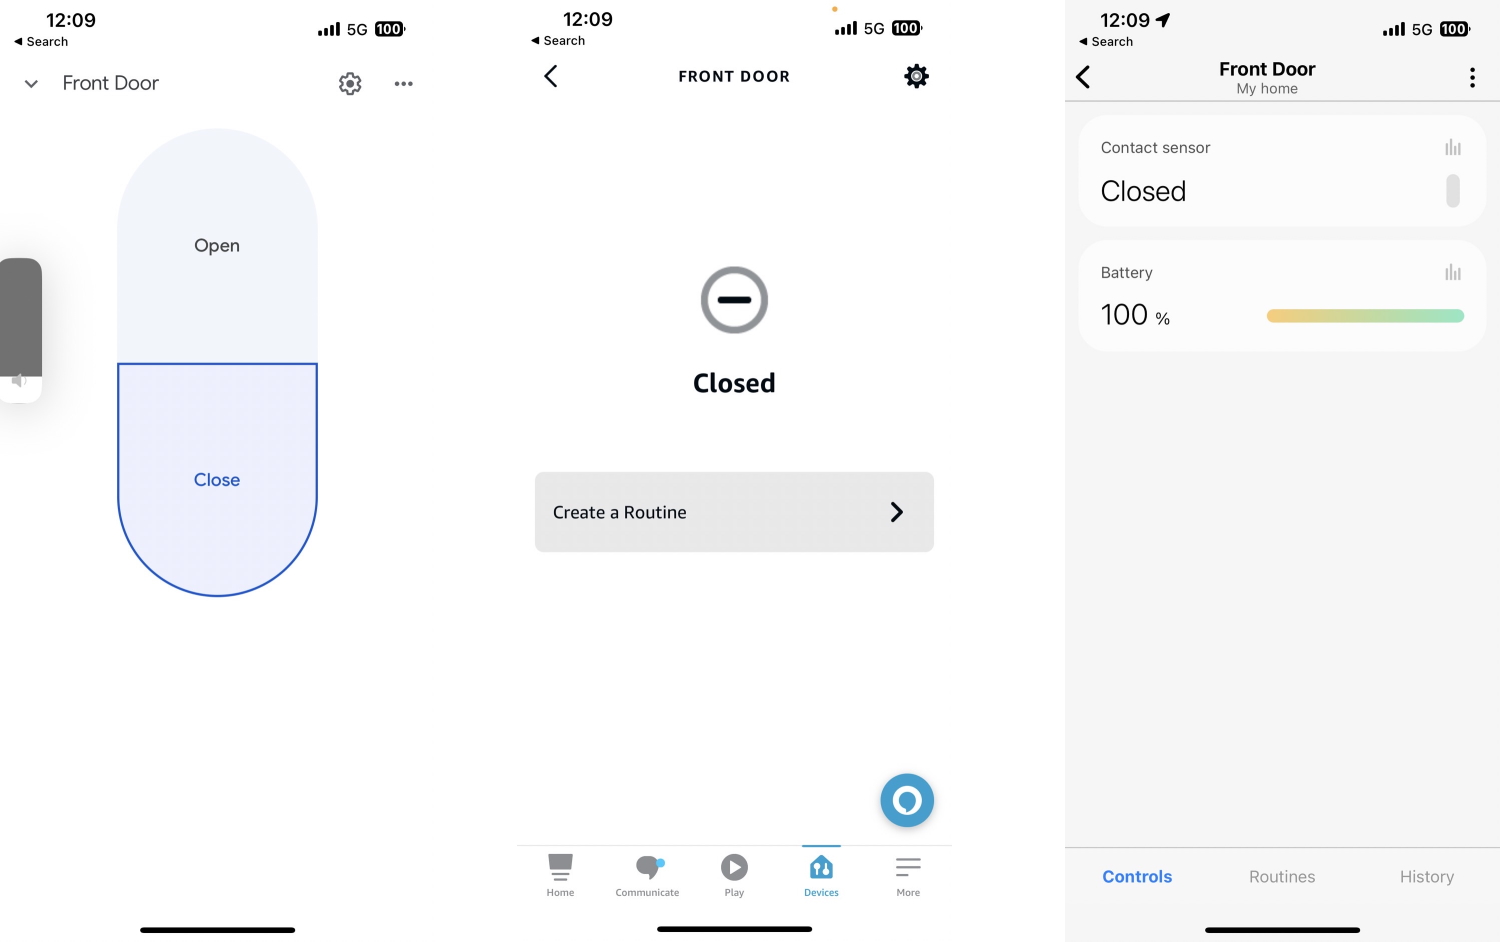
Now you should be able to see the contact state via Alexa, Google Home, SmartThings and Sinric Pro App
Step 3 : Voice Announcements!
✅ How it works:
1️⃣ Add a Switch in SinricPro (your secret trigger!)
2️⃣ Create an Alexa Routine that speaks your message when a “Someone is at the door!” when Switch turned on
3️⃣ Send a power state event to turn ON that switch from your code
void triggerVoiceAnnouncement() {
    SinricProSwitch& mySwitch = SinricPro[SWITCH_ID];
    mySwitch.sendPowerStateEvent(true);
}
Troubleshooting
- Please refer to our Troubleshooting page for more details.
This document is open source. See a typo? Please create an issue


