

How to Control a Relay (Turn On/Off) Using MicroPython on an ESP32 with Pymakr
In this guide, we’ll walk you through the steps of setting up MicroPython on your ESP32, creating a Sinric Pro Switch and ultimately controlling it with smart home platforms like Alexa, Google Home, and SmartThings
Prerequisites :
- ESP32 dev board x 1.
- SPDT Relay controller x 1.
- Jumper Wires.
Setup MicroPython in ESP32
-
Install using pip:
pip install esptool(You will need Python 3.7 or newer) -
MicroPython firmware: Download the latest version from https://micropython.org/download/esp32/. Choose the appropriate file based on your board’s features (e.g., PSRAM, flash size).
-
Connect the ESP32 to your computer via USB.
-
Erase the ESP32’s flash memory:
esptool --chip esp32 --port <PORT> erase_flash -
Write the MicroPython to the ESP32:
esptool --chip esp32 --port <COM-PORT> --baud 460800 write_flash -z 0x1000 ESP32_GENERIC-20231005-v1.21.0.bin
Test the Installation:
- Use a serial terminal program (e.g., PuTTY, CoolTerm, Thonny).
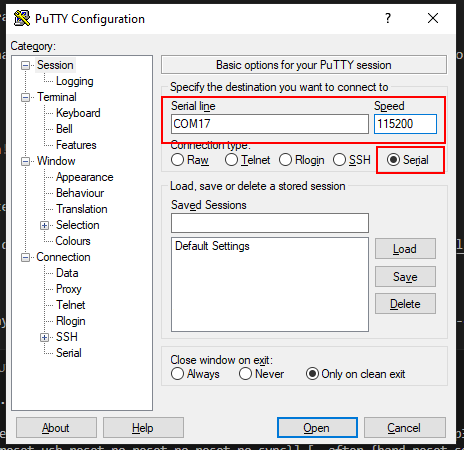
-
Configure with: Baud rate: 115200 Port: The one connected to your ESP32.
-
Open the serial terminal to access the MicroPython REPL, where you can enter Python commands.
In the REPL, type
print("Hello, MicroPython!")

and press Enter. If successful, you’ll see the message printed.
Refer to the MicroPython documentation for details: https://docs.micropython.org/en/latest/esp32/quickref.html
Setup IDE
We are going to use VS Code with Pymakr extension to program our ESP32 with MicroPython. So let’s setup Pymakr extension
-
Open VS Code.
-
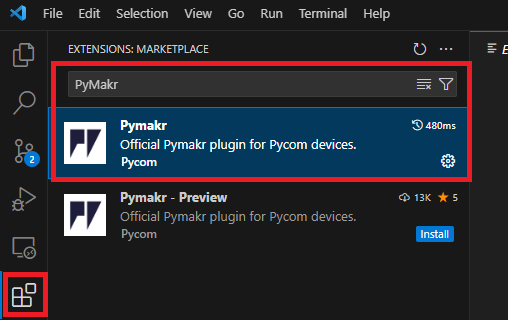
Go to the Extensions tab (Ctrl+Shift+X or Cmd+Shift+X).
-
Search for “Pymakr” and click the “Install” button next to it.
Reload VS Code when prompted.
Click the “Pymakr” icon in the left sidebar of VS Code.
Wiring
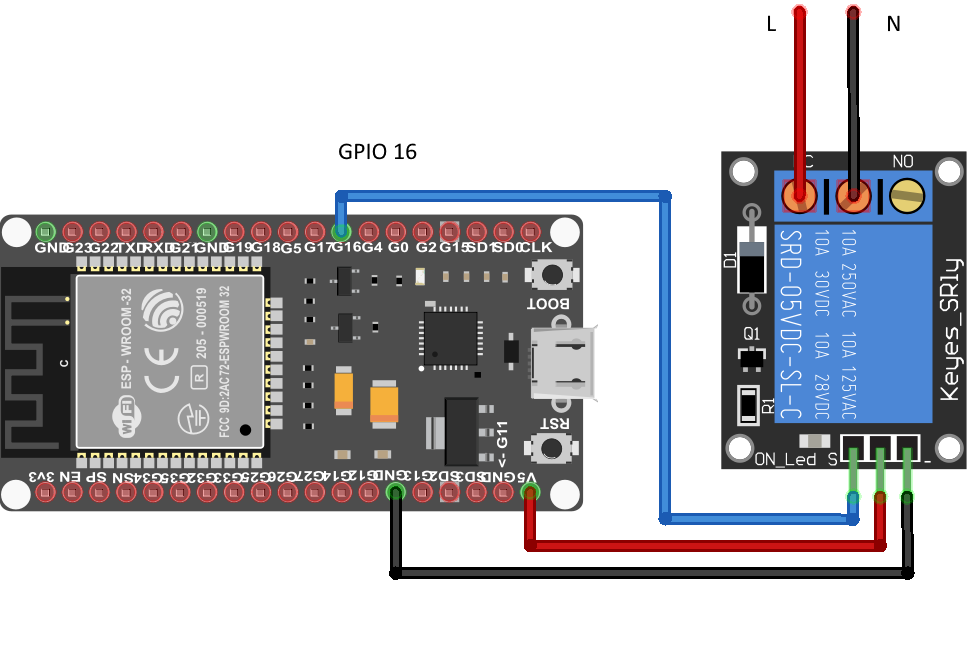
Before we integrate with Sinric Pro, it is important to verify that the relay is wired correctly and it’s working.
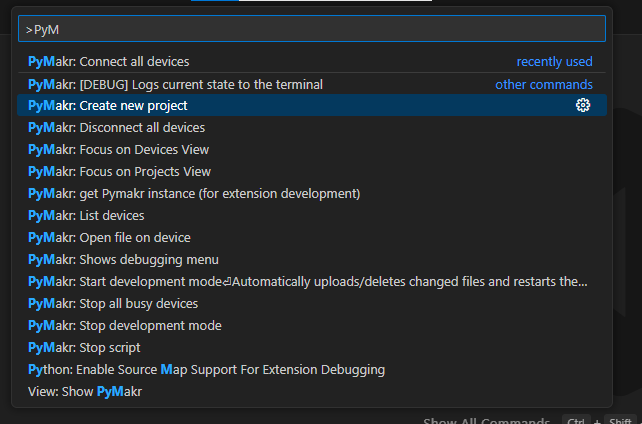
Let’s create a new Pymark Project. Press (Ctrl+Shift+P) and select PyMark: Create new project
Paste this code in main.py
from machine import Pin
from time import sleep

relay = Pin(16, Pin.OUT)

while True:
  relay.value(1)
  sleep(5)

  relay.value(0)
  sleep(5)
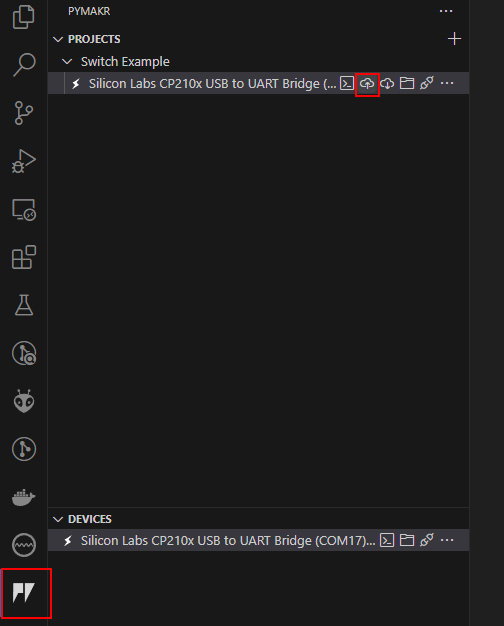
Select PyMark extention -> Connect to your ESP32 -> Click on Upload Icon.
Once upload compleres, you must perform a Hard reset device. Then ESP32 will reboot and execute the code in main.py
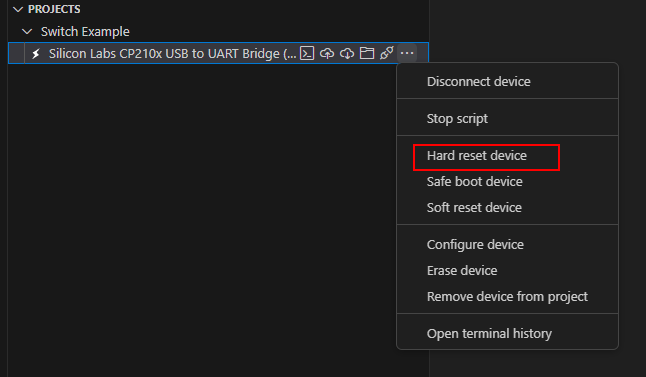
Now your relay should trun on and off every 5 seconds. If the relay is working correctly, time to integrate with Sinric Pro.
Sinric Pro integration
Step 1 : Create a new device in Sinric Pro
- Login to your Sinric Pro account, go to Devices menu on your left and click Add Device button (On top left).
- Enter the device name Switch, description My First Switch and select the device type as Switch.
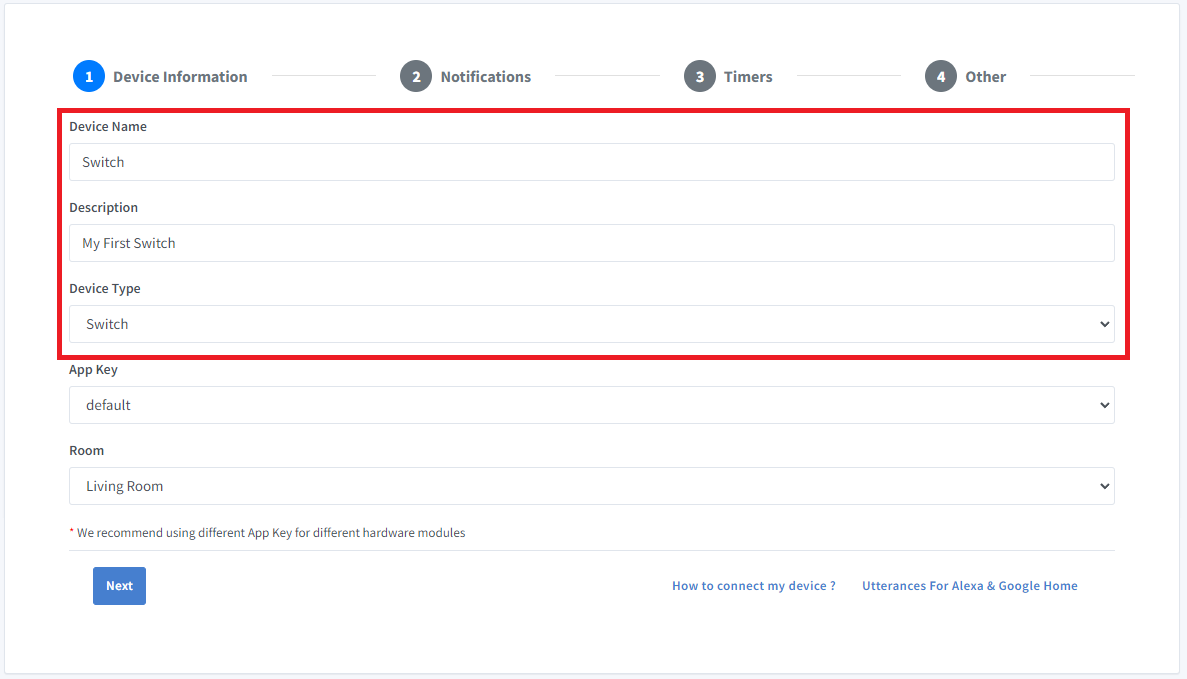
- Click Next the in the Notifications tab
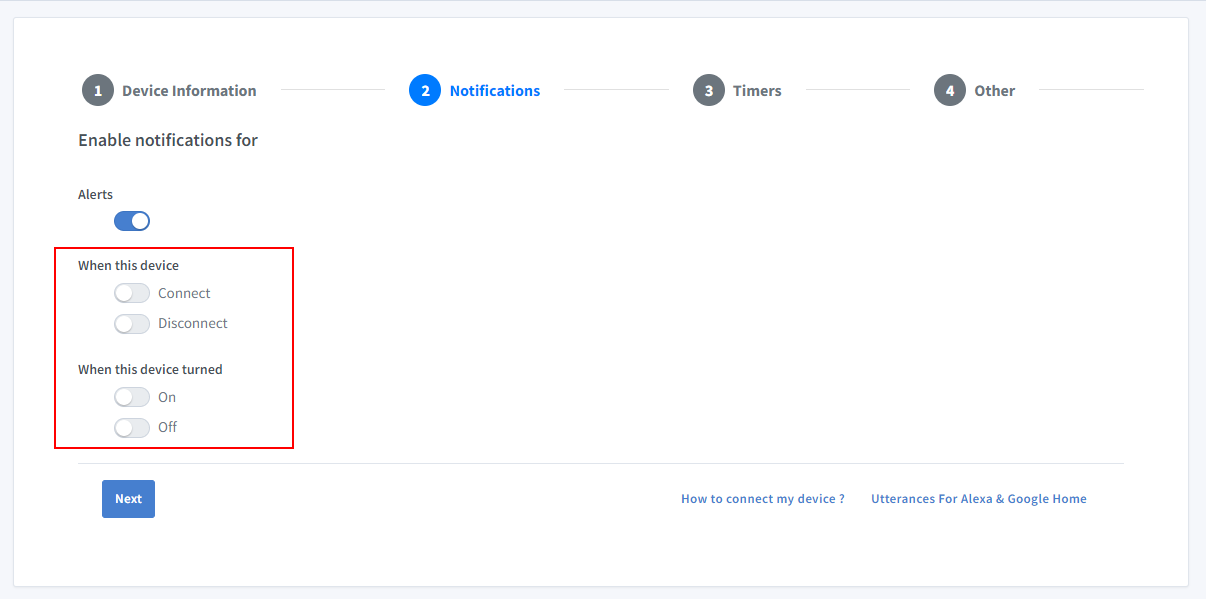
To receive push notifications when your device goes online or offline, enable the “Connect and Disconnect” option in the Sinric Pro app. To receive push notifications when your device turns on or off, enable the “On and Off” option.
-
Click Others and Click Save
-
Next screen will show the credentials required to connect the device you just created.
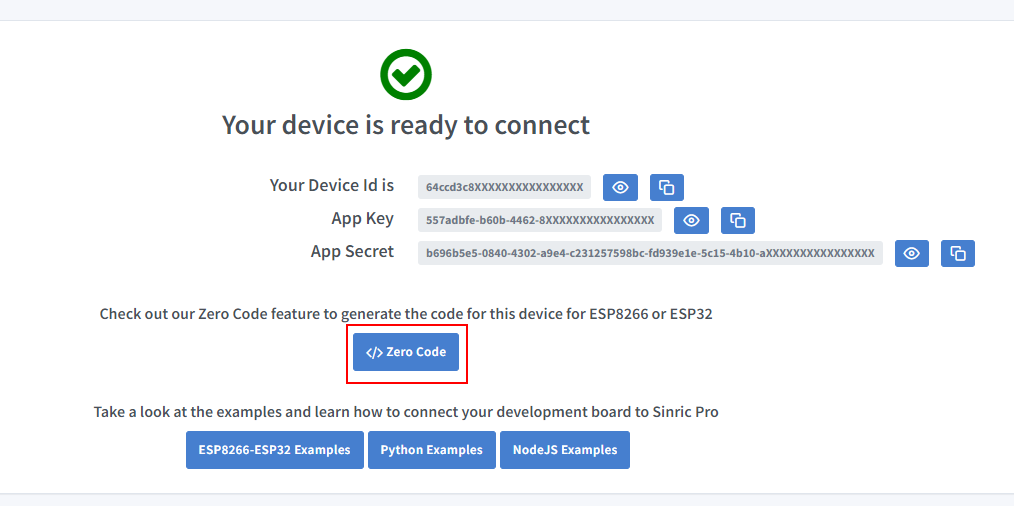
- Copy the Device Id, App Key and App Secret Keep these values secure. DO NOT SHARE THEM ON PUBLIC FORUMS !
Step 2 : Coding
2.1 Install Sinric Pro MicroPython Library
Using mpremote:
mpremote mip install github:sinricpro/micropython-sinricpro-sdk
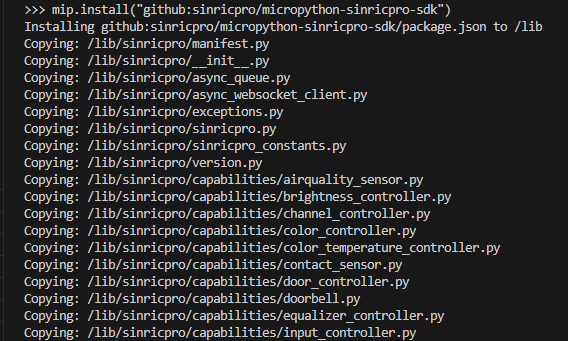
Or using mip in MicroPython REPL prompt:
import mip
mip.install("github:sinricpro/micropython-sinricpro-sdk")`
2.2 Complete Code
Paste the following code in main.py
from sinricpro import SinricPro
from sinricpro.devices.sinricpro_switch import SinricProSwitch
from machine import Pin
import uasyncio as a
import network
# enter wifi details
ssid = ""
ssid_password = ""
# enter appkey, appsecret and device id from above
app_key = ""
app_secret = ""
device_id = ""
# relay is connected to GPIO 16
relay = Pin(16, Pin.OUT)
async def on_disconnected():
print('Disconnected from SinricPro...reboot?')
async def on_connected():
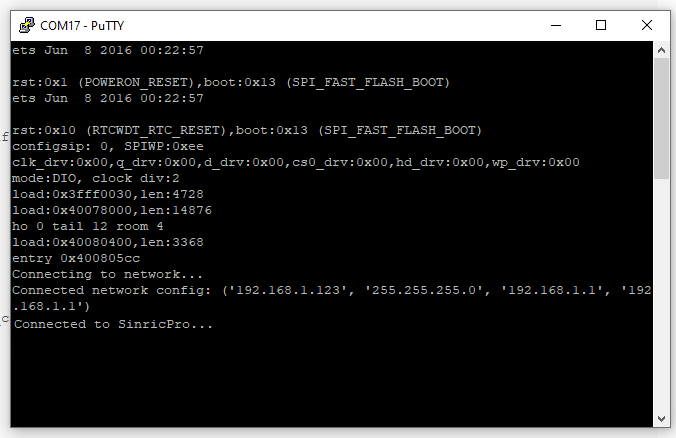
print('Connected to SinricPro...')
async def on_power_state_callback(device_id: str, state: bool):
print(f'device id: {device_id} state: {state}')
if state:
relay.value(1)
else:
relay.value(0)
return True
# connect to wifi
def do_connect():
sta_if = network.WLAN(network.STA_IF)
ap = network.WLAN(network.AP_IF) # create access-point interface
ap.active(False) # deactivate the interface
if not sta_if.isconnected():
print('Connecting to network...')
sta_if.active(True)
sta_if.connect(ssid, ssid_password)
while not sta_if.isconnected():
pass
print('Connected network config:', sta_if.ifconfig())
# start sinricpro
def do_sinricpro():
sinricpro = SinricPro()
sinricpro.on_connected(on_connected)
sinricpro.on_disconnected(on_disconnected)
sinricpro_switch = SinricProSwitch(device_id)
sinricpro_switch.on_power_state(on_power_state_callback)
sinricpro.add_device(sinricpro_switch)
sinricpro.start(app_key, app_secret)
# main coroutine
async def main():
do_connect()
do_sinricpro()
while True:
await a.sleep_ms(10_000)
# start asyncio task and loop
try:
# start the main async tasks
a.run(main())
finally:
# reset and start a new event loop for the task scheduler
a.new_event_loop()
That’s it.
Now the device is connected to Sinric Pro server and you can control it via Sinric Pro App, Alexa Skill, Google Home Action or SmartThings
This document is open source. See a typo? Please create an issue