

Dimmable Switch Tutorial using RobotDyn AC Light Dimmer Module
In this section we’ll walk through creating a Light dimmer with RobotDyn and then control the light brightness via Alexa, GoogleHome or SmartThings.
Prerequisites :
- ESP32 or ESP8266 x 1.
- RobotDyn AC Light Dimmer.
- Dimmable Light Bulb.
- Jumper Wires.
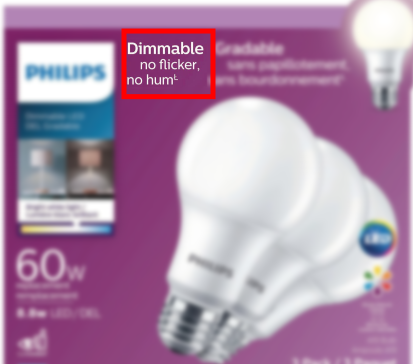
Not all the light bulbs are dimmable. Please check the manufacturer’s label to see if the bulb is dimmable.
Quick introduction to RobotDyn AC Light Dimmer Module
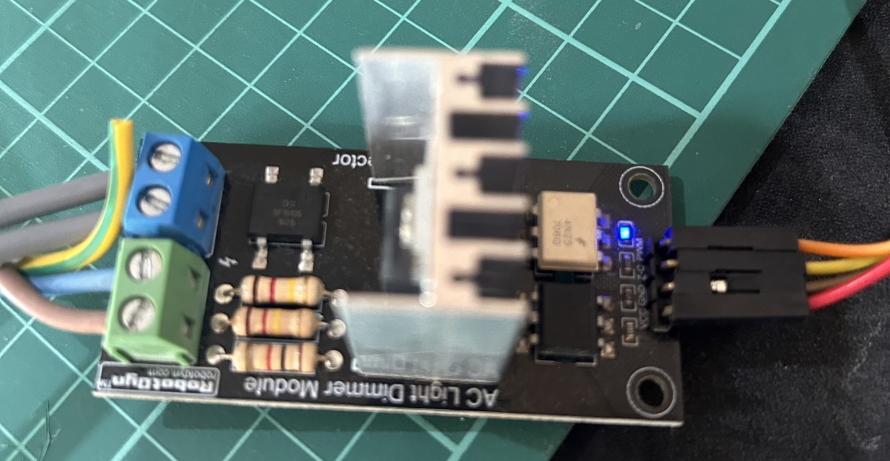
The RobotDyn AC Light Dimmer Module is a device that allows you to control the brightness of AC lights using a microcontroller. It is a small and easy-to-use module that can be used with microcontrollers, such as the ESP8266, ESP32. The module works by using a triac to control the flow of current to the light bulb. The triac is a semiconductor device that can be used to switch AC current on and off. The RobotDyn AC Light Dimmer Module uses a PWM signal to control the triac, which in turn controls the brightness of the light bulb.
Wiring RobotDyn AC Light Dimmer
You can use the below pin mapping table to connect your ESP32/ESP8266 with RobotDyn AC Light Dimmer module.
 *  +---------------+-------------------------+-------------------------+
 *  |   Board       | INPUT Pin               | OUTPUT Pin              |
 *  |               | Zero-Cross              | PWM                     |
 *  +---------------+-------------------------+-------------------------+
 *  | ESP8266       | D1(IO5),    D2(IO4),    | D0(IO16),   D1(IO5),    |
 *  |               | D5(IO14),   D6(IO12),   | D2(IO4),    D5(IO14),   |
 *  |               | D7(IO13),   D8(IO15),   | D6(IO12),   D7(IO13),   |
 *  |               |                         | D8(IO15)                |
 *  +---------------+-------------------------+-------------------------+
 *  | ESP32         | 4(GPI36),   6(GPI34),   | 8(GPO32),   9(GP033),   |
 *  |               | 5(GPI39),   7(GPI35),   | 10(GPIO25), 11(GPIO26), |
 *  |               | 8(GPO32),   9(GP033),   | 12(GPIO27), 13(GPIO14), |
 *  |               | 10(GPI025), 11(GPIO26), | 14(GPIO12), 16(GPIO13), |
 *  |               | 12(GPIO27), 13(GPIO14), | 23(GPIO15), 24(GPIO2),  |
 *  |               | 14(GPIO12), 16(GPIO13), | 25(GPIO0),  26(GPIO4),  |
 *  |               | 21(GPIO7),  23(GPIO15), | 27(GPIO16), 28(GPIO17), |
 *  |               | 24(GPIO2),  25(GPIO0),  | 29(GPIO5),  30(GPIO18), |
 *  |               | 26(GPIO4),  27(GPIO16), | 31(GPIO19), 33(GPIO21), |
 *  |               | 28(GPIO17), 29(GPIO5),  | 34(GPIO3),  35(GPIO1),  |
 *  |               | 30(GPIO18), 31(GPIO19), | 36(GPIO22), 37(GPIO23), |
 *  |               | 33(GPIO21), 35(GPIO1),  |                         |
 *  |               | 36(GPIO22), 37(GPIO23), |                         |
 *  +---------------+-------------------------+-------------------------+
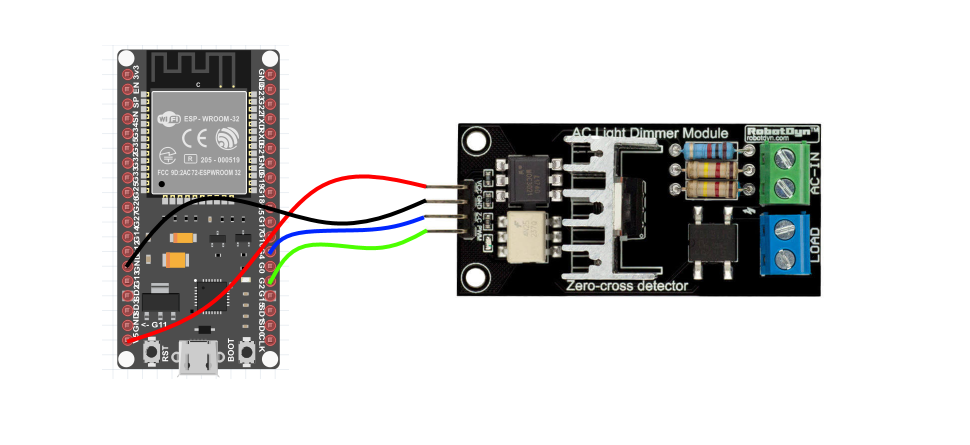
Connect the RobotDyn module to the microcontroller as follows:
- VCC pin to the microcontroller’s 5V pin (3.3V does not seems to work).
- GND pin to the ESP32’s GND pin.
- PWM pin to a digital pin 2 on the microcontroller.
- Z-C pin to a digital pin 4 on the microcontroller.
| MCU | Zero Cross Pin | PWM/ADC Pin |
|---|---|---|
| ESP32 | 4 | 2 |
Let’s verify that RobotDyn AC Light Dimmer Module is wired correctly and working.
Arduino IDE Serial Monitor will show the dimming like this:
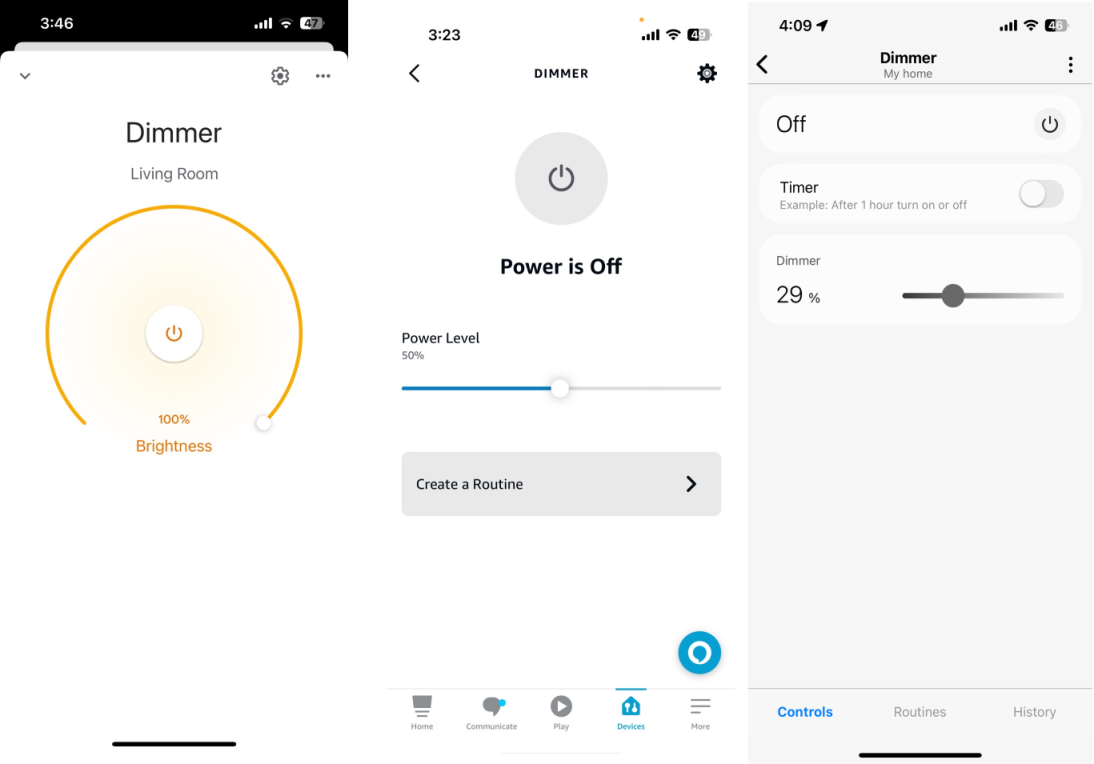
Step 1 : Create a new device in Sinric Pro
- Login to your Sinric Pro account, go to Devices menu on your left and click Add Device button (On top left).
- Enter the device name Dimmer, description Dimmer and select the device type as Switch With Dimming.
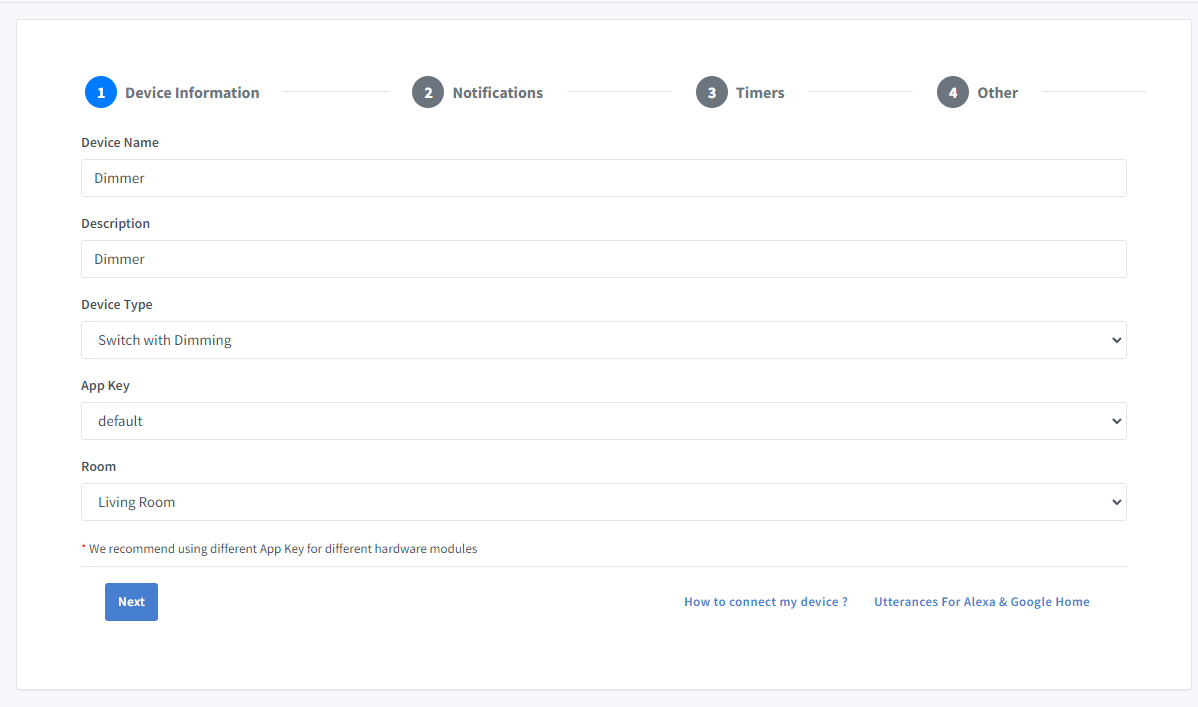
-
Click Others tab and Click Save
-
Next screen will show the credentials required to connect the device you just created.
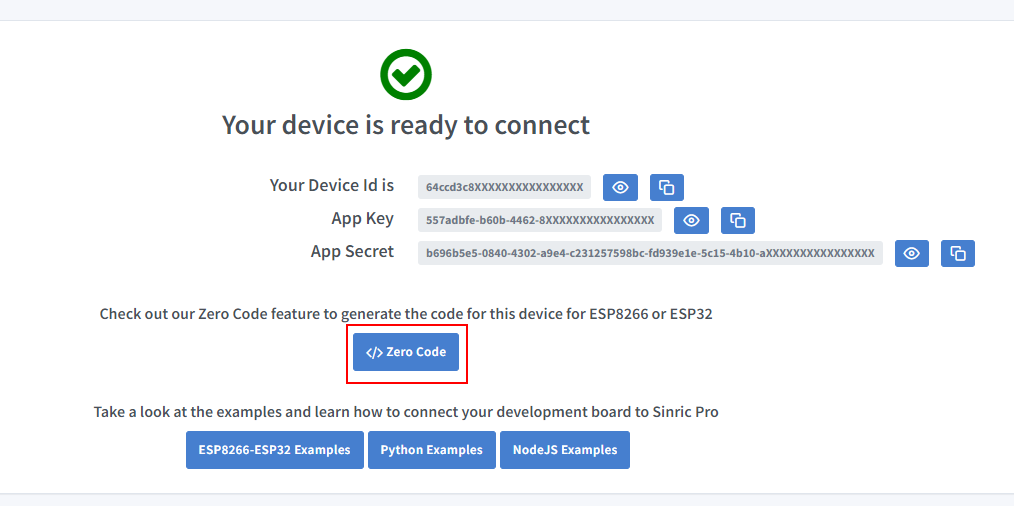
- Copy the Device Id, App Key and App Secret Keep these values secure. DO NOT SHARE THEM ON PUBLIC FORUMS !
Step 2 : Connect to Sinric Pro
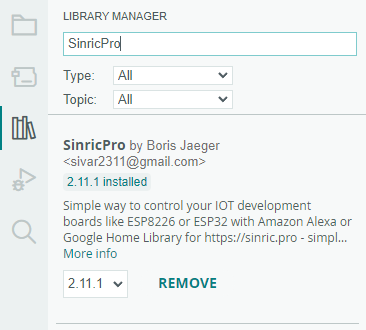
Step 2.1 Install Sinric Pro Library
2.2 Complete Code
Troubleshooting
- Does not dim ? Please check the manufacturer’s label to see if the light bulb is dimmable.
- PWM not working ?
Above LED lights up when the module recevice the PWM signal from MCU.
- Please refer to our Troubleshooting page for more details.
This document is open source. See a typo? Please create an issue