

Temperature Sensor Tutorial for LM35 (LM35DZ), LM335 and LM34
In this section we’ll walk through creating a Temperature Sensor using ESP32, ESP8266 and then view the temperature via Alexa, Google Home or SmartThings.
Prerequisites :
- ESP32, ESP8266 x 1.
- LM35, LM335 and LM34 x 1.
- Jumper Wires.
Quick introduction to Temperature Sensor
The LM35/LM34 temperature sensors are a linear integrated circuit temperature sensor that works by measuring the voltage drop between the base and emitter of a diode-connected transistor. The voltage drop between the base and emitter of a diode-connected transistor decreases at a known rate as the temperature increases.
-
LM35 provides temperature measurements in Celsius (°C)
-
LM32 provides temperature measurements in Fahrenheit (ºF).
-
LM335 provides temperature measurements in Kelvin (ºK)
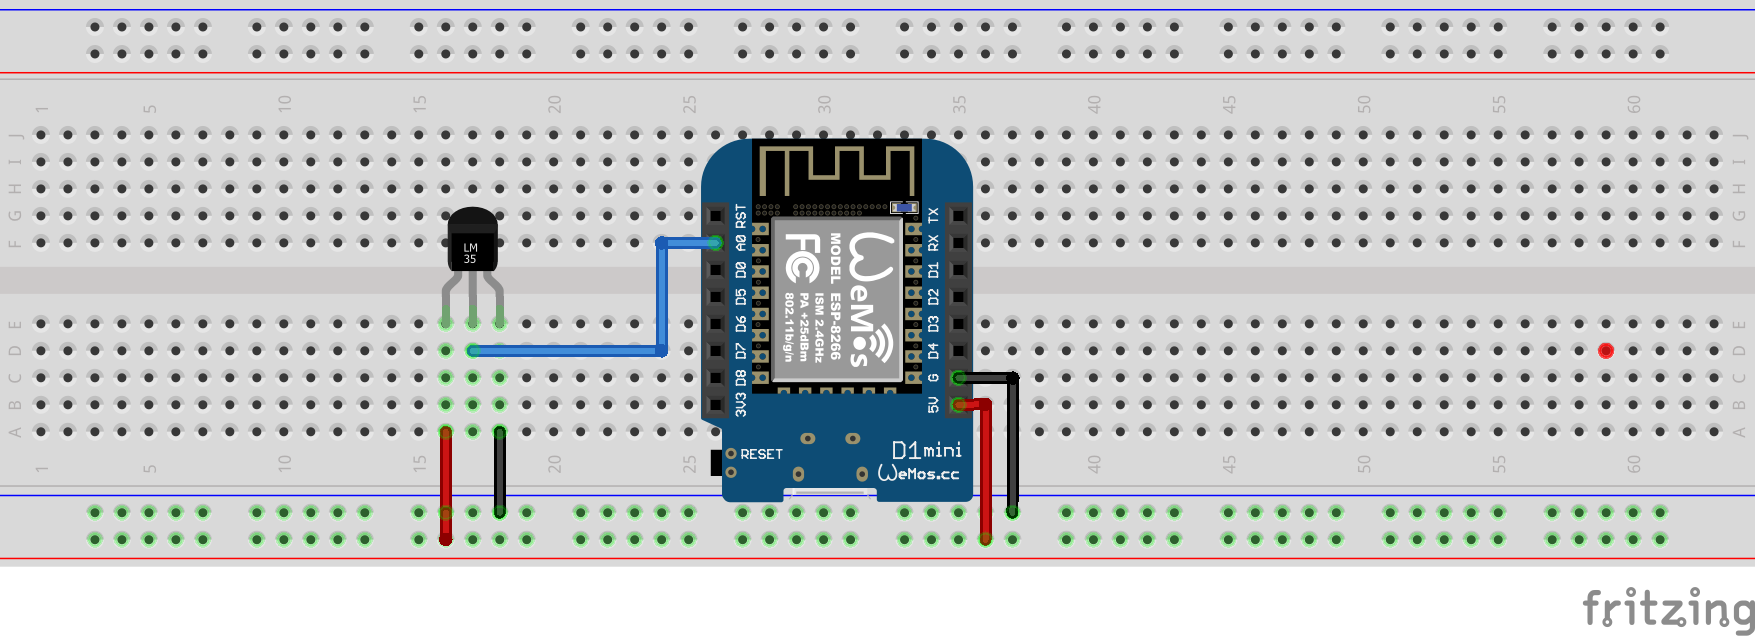
Wiring for LM35 or LM34 with ESP8266
Wiring for LM335 with ESP8266
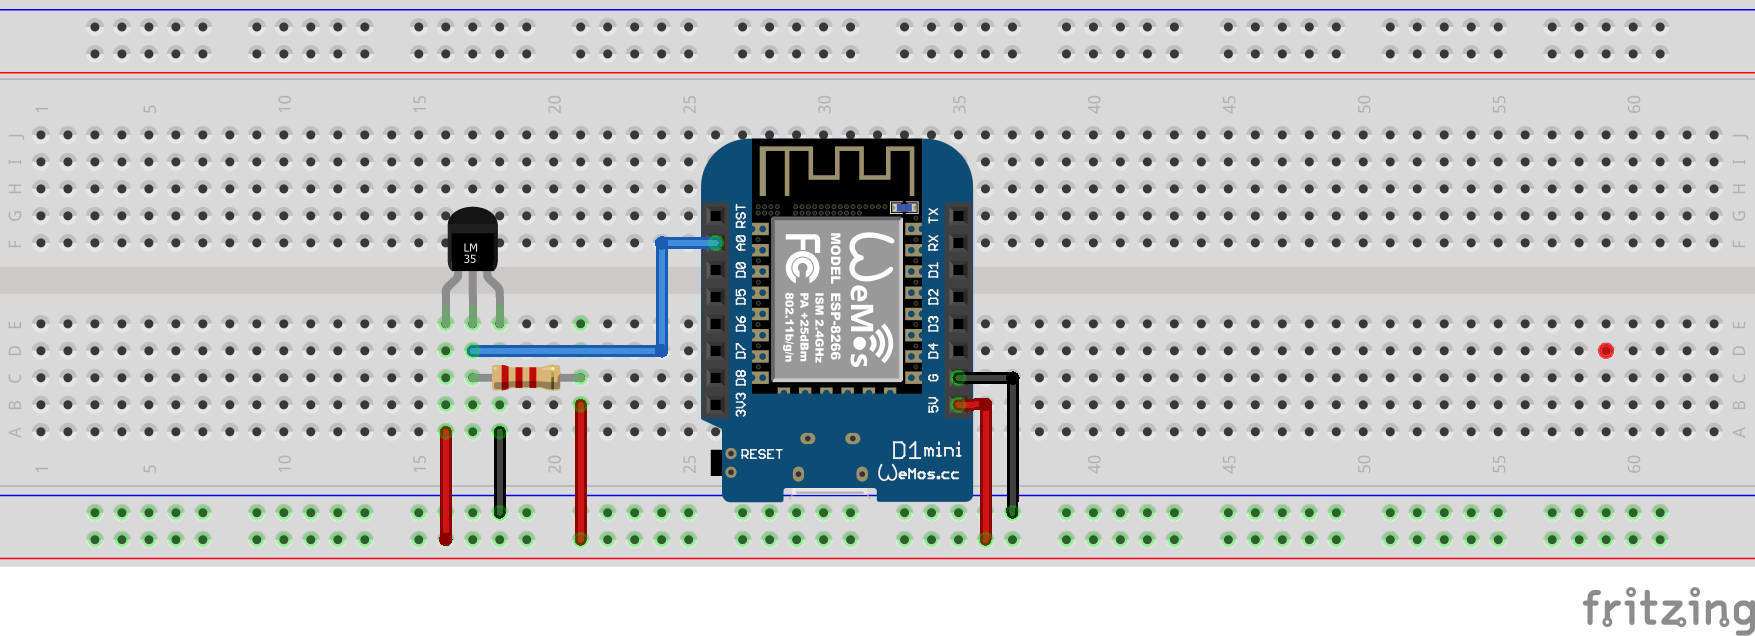
Pull-up via 2.2k Ohm resistor
| MCU | GPIO Pin |
|---|---|
| ESP32 | 36 (ADC0) |
| ESP8266 | A0 (ADC0) |
Let’s verify that temperature is wired correctly and working.
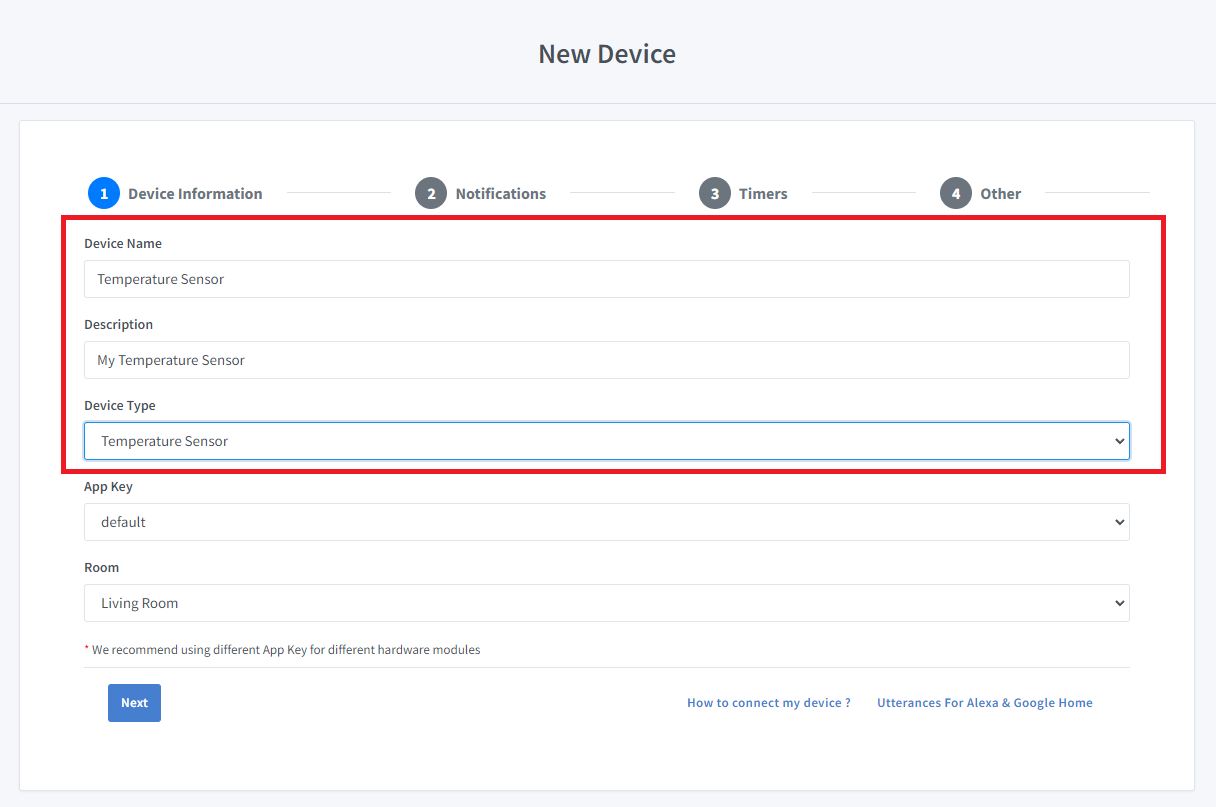
Step 1 : Create a new device in Sinric Pro
- Login to your Sinric Pro account, go to Devices menu on your left and click Add Device button (On top left).
- Enter the device name Temperature Sensor, description My Temperature Sensor and select the device type as Temperature Sensor.
- Click Next the in the Notifications tab
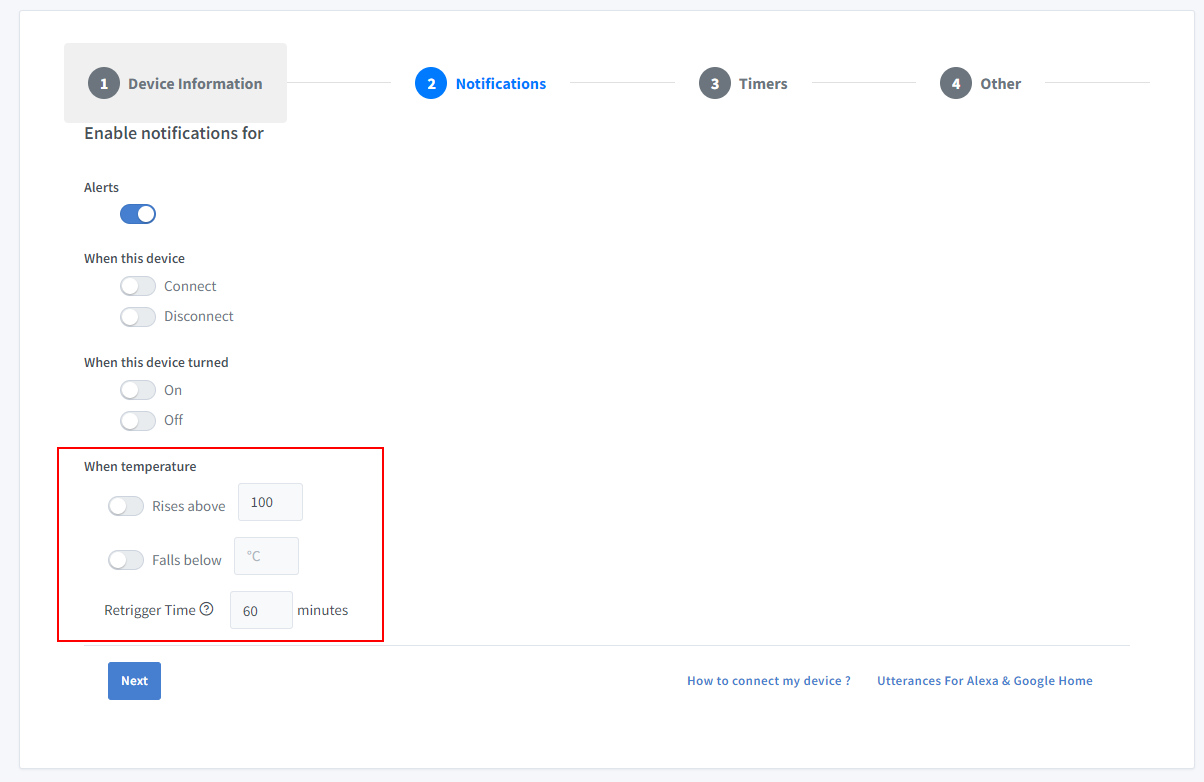
You can set the threshold here to receive a push notification via the Sinric Pro app when the temperature goes below or above a certain temperature. Use the Retrigger Time to set the delay between notifications.
-
Click Others tab and Click Save
-
Next screen will show the credentials required to connect the device you just created.
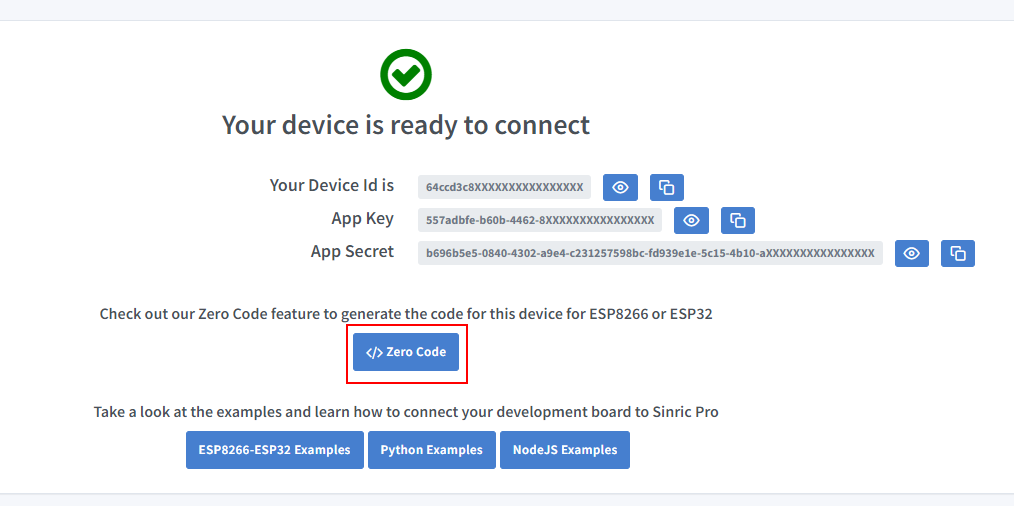
- Copy the Device Id, App Key and App Secret Keep these values secure. DO NOT SHARE THEM ON PUBLIC FORUMS !
Step 2 : Connect to Sinric Pro
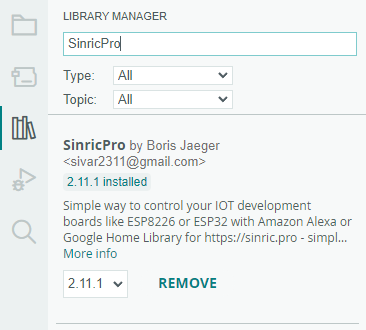
Step 2.1 Install Sinric Pro Library
You can generate the code using Zero Code feature or write it by your self. If you do not have programming experice, we recommend to use Zero Code feature in the Portal to generate the code, download and flash.
2.2 Complete Code
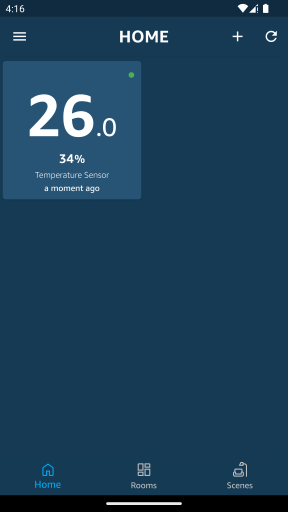
Now you should be able to view the temperature via Sinric Pro App
Please note that Google Home App shows the temperature sensor as a Thermostat due to Google Home limitations.
Troubleshooting
- Please refer to our Troubleshooting page for more details.
This document is open source. See a typo? Please create an issue