


How to Control an ESP32 or ESP8266 with Alexa and Google Home
This guide shows how to connect an ESP32 or ESP8266 (NodeMCU, Wemos D1 mini) to Amazon Alexa and Google Home, so you can turn a relay, light or any other output on and off with your voice.
You do not need to write an Alexa skill or a Google Home action, and you do not need to open any ports on your router.
How it works
- Your ESP32 or ESP8266 runs the Sinric Pro library and keeps a secure connection open to the Sinric Pro server.
- You link the Sinric Pro Alexa skill or Google Home action to your Sinric Pro account once.
- When you say “Alexa, turn on the switch”, Alexa sends the command to Sinric Pro, and Sinric Pro forwards it to your board.
Because the board connects out to the server, it works from anywhere and on any home network.
Sinric Pro is an official Alexa Smart Home skill and Google Home action. It does not use device emulation. If you are coming from Espalexa or fauxmoESP, see Espalexa or fauxmoESP “Device Not Found”?
What you need
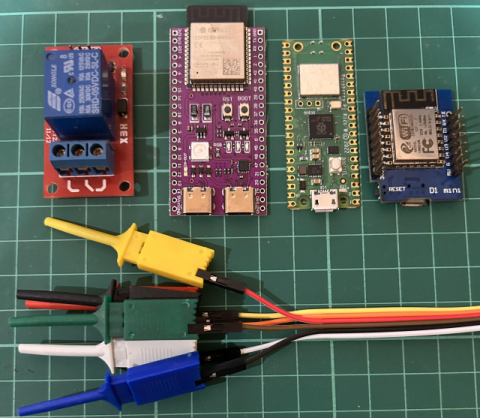
- ESP32 or ESP8266 development board x 1.
- A relay module or an LED to control.
- Arduino IDE or PlatformIO.
- A free Sinric Pro account. See pricing for the limits of the free plan.
Step 1 : Create a device in Sinric Pro
- Login to your Sinric Pro account, go to Devices menu on your left and click Add Device button (On top left).
- Enter the device name Switch, description My First Switch and select the device type as Switch.
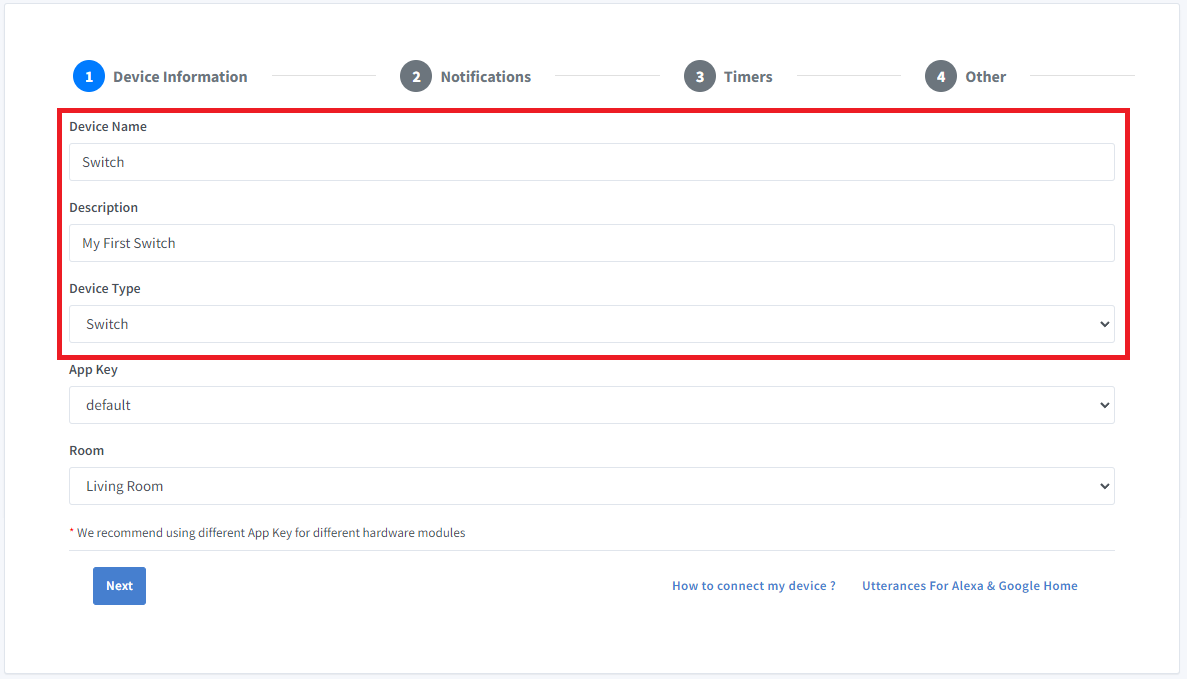
- Click Save.
- Next screen will show the credentials required to connect the device you just created.
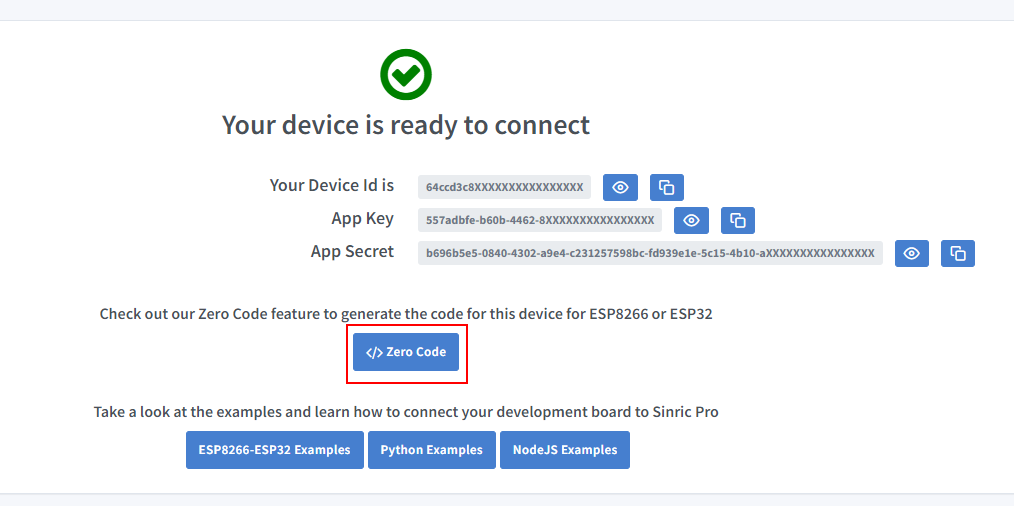
- Copy the Device Id, App Key and App Secret Keep these values secure. DO NOT SHARE THEM ON PUBLIC FORUMS !
The device name is what you will say to Alexa or Google Home, so choose a name that is easy to pronounce.
Step 2 : Install the Sinric Pro library
In Arduino IDE open Tools > Manage Libraries, search for SinricPro and click Install.

For PlatformIO, dependencies and common errors, see How to install the Sinric Pro library.
Step 3 : Upload the code
The same sketch works on ESP32 and ESP8266. Enter your Wi-Fi details and the three values from Step 1.
#include <Arduino.h>
#if defined(ESP8266)
  #include <ESP8266WiFi.h>
#elif defined(ESP32)
  #include <WiFi.h>
#endif

#include <SinricPro.h>
#include <SinricProSwitch.h>

#define WIFI_SSID   "YOUR-WIFI-SSID"
#define WIFI_PASS   "YOUR-WIFI-PASSWORD"
#define APP_KEY     "YOUR-APP-KEY"
#define APP_SECRET  "YOUR-APP-SECRET"
#define SWITCH_ID   "YOUR-DEVICE-ID"

#if defined(ESP8266)
  #define RELAY_PIN 12   // D6
#elif defined(ESP32)
  #define RELAY_PIN 16
#endif

// called when Alexa, Google Home or the Sinric Pro app turns the switch on or off
bool onPowerState(const String &deviceId, bool &state) {
  Serial.printf("Device %s turned %s\r\n", deviceId.c_str(), state ? "on" : "off");
  digitalWrite(RELAY_PIN, state ? HIGH : LOW);
  return true; // request handled
}

void setup() {
  Serial.begin(115200);
  pinMode(RELAY_PIN, OUTPUT);

  WiFi.begin(WIFI_SSID, WIFI_PASS);
  while (WiFi.status() != WL_CONNECTED) {
    delay(250);
    Serial.print(".");
  }

  SinricProSwitch &mySwitch = SinricPro[SWITCH_ID];
  mySwitch.onPowerState(onPowerState);

  SinricPro.begin(APP_KEY, APP_SECRET);
}

void loop() {
  SinricPro.handle();
}
If you do not want to write code, the Zero Code feature in the Portal can generate the sketch for you.
Once the board connects, the device shows as online in the Portal and you can switch it on and off from there. For wiring a relay, see Switch Tutorial Part 1.
Step 4 : Connect to Amazon Alexa
- Open your Amazon Alexa app.
- Go to Skills & Games.
- Search for Sinric Pro.
- Click ENABLE TO USE.
- Enter your Sinric Pro credentials in the linking page.
- Ask Alexa to discover new devices.
- Say “Alexa, turn on the Switch”.
More about discovery, routines and troubleshooting: Amazon Alexa.
Step 5 : Connect to Google Home
- Open Google Home and click on Add.
- Select Setup Device.
- Select Works with Google Home.
- Search for Sinric Pro.
- Link your account.
- Say “Hey Google, turn on the Switch”.
More: Google Home.
Samsung SmartThings
- Open the SmartThings app and tap the + Icon.
- Select Device.
- Select Sinric Pro under By Brand.
- Link your account.
- Now you can turn the Switch on or off from the dashboard.
More: Samsung SmartThings.
What else can you build?
A switch is only the starting point. The same steps work for other device types:
- Dimmable light with a RobotDyn AC dimmer
- RGB LED strip
- Temperature sensor (DHT11, DHT22)
- Motion sensor
- Contact (door / window) sensor
- Doorbell
- TV remote with an IR transceiver
- All quickstart tutorials
Frequently asked questions
Do I need to create my own Alexa skill?
No. You enable the existing Sinric Pro skill and link your account.
Does it work with boards other than ESP32 and ESP8266?
Yes. There are SDKs for Raspberry Pi Pico W, Arduino UNO R4 WiFi, Nano 33 IoT, MKR WiFi 1010, MicroPython, Python and NodeJS. See the SDK list.
Can I control more than one device from one board?
Yes. One ESP32 or ESP8266 can host several Sinric Pro devices, for example a 4-channel relay board. See Modules and Part 3 of the switch tutorial.
Can I use it with Apple HomeKit or Home Assistant?
Yes. See Homebridge (HomeKit) and Home Assistant.
Troubleshooting
Please refer to our Troubleshooting page for possible solutions to your issue.
This document is open source. See a typo? Please create an issue